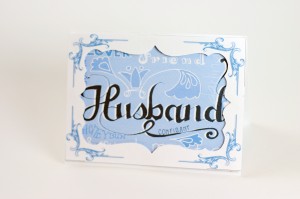
 My husband recently woke up at the crack of 4:30am with me to attend a volunteer segment at my job. He whined and moaned, but all in all I was very appreciative of him going when he didn’t have to. Also, with sweetest day coming up (OCT 15th!), I wanted to show my appreciation. I designed and made this card with 1 sheet of white cardstock, a couple bits found around the house. The “Husband” graphic was made from hand-drawn type that I scanned and colored. You can see the template here.
How To Make It:
- Download the template and print onto white card stock. (Or use markers/stamps/whatever you have around the house to make a pretty card face. (tip: print out the alphabet from different fonts and trace the letters one by one. To form the “Husband”) This will be your Husband graphic)
- Cut a sheet of white card stock in half, creating a 5.5 in x 8 in piece. Score and fold that piece down the middle, forming a 5.5 in x 4 in card.
- From the printed template, cut out the Husband graphic and the Frame graphic. If desired, save the inner scrap from the frame piece to use on the inside of the card. (if not using the template, Cut (from a separate sheet) a 5.5 in x 4 in rectangle. Use a craft knife to cut out a decorative shape in the middle. This will be your frame piece.)
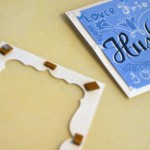
- Using scrap cardboard or foam-core board, cut 8 quarter inch spacer squares. Glue these evenly spaced to the back of the frame piece. Let dry.

- Glue the Husband graphic onto the face of the card.
- Dab glue onto the spacer squares, and then position the frame piece on top of the Husband graphic on the face of the card.
- Voila! Write a sweet message on the inside!
OPTIONAL
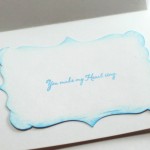
- If you were able to save the inner portion of your frame piece from the template, you may flip it over (so the printed words and lines don’t show) and use chalk dust OR a paper towel dipped in just the tiniest about of stamp ink , OR a dry brush with a tiny bit of paint to color the edges of the shape.

- Stamp or write your desired message onto the shape, and glue it to the inside of the card.
The following two tabs change content below.


Kayla Domeyer
My name is Kayla and I am a Graphic Designer. That means that I love pretty things, and also that I like to make free printables! I'm so happy that you've stopped by to visit my blog, and I hope you will follow me on Facebook, Twitter, Google +, Pinterest or Instagram!! (Yeah, and I'm totally addicted to the internet).
Latest posts by Kayla Domeyer (see all)
- Miniature Bohemian Style 1:12 Dollhouse Rattan Shelf - August 24, 2023
- How to Solve Stress with Princess Bathtub Melts - June 2, 2020
- 25 Valentines Even a Toddler Can Make - February 11, 2020
