Since their invention in the early 1970’s, plastic Easter eggs have become an integral part of the Easter image. Children running around collecting hard plastic eggs into pretty wicker baskets is an idyllic image on par with any Normal Rockwell painting.

Over the years I’ve done a few things with plastic eggs, including using them as a mold to make marshmallow eggs to decorate. On occasion I’ve bought a few to pair with a cute Easter printable and give away – but my squish was too young for them so there haven’t been many in my house. Now, there are some on my house. This enchanting plastic egg wreath might not last for years, but that’s what I like about it. Its bright, spring colors are the perfect addition to my front door and it came together really easily!
What You Need:
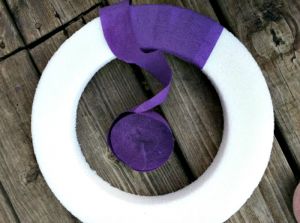
- White Foam Wreath Form
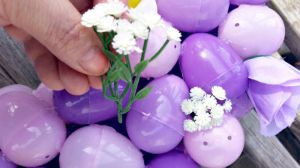
- Purple Plastic Easter Eggs
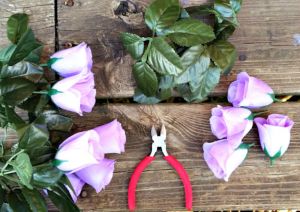
- Artificial Lavender Rosebuds
- Additional greenery you may have on hand. We had some artificial flowers left from a Mother’s Day craft the year before.
- Purple Paper Jumbo Streamers
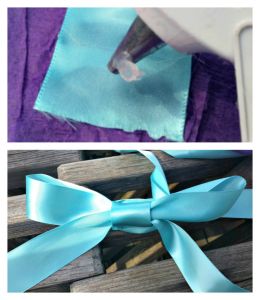
- Ribbon
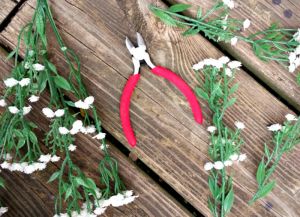
- Faux Baby’s Breath Stems
- Glue Gun
- Hot Glue
- Wire Cutters

How To Make It
- Using your wire cutters, cut your rose buds off at the top of the stem. Separate the extra leaves.
- Using your wire cutters, separate your baby’s breath. Cut the blooms about 2″ down. Snip off the smaller leaves. This makes it easier to stick them into the foam wreath.
- Snap your plastic Easter eggs into place.
- Wrap your paper streamer around the foam wreath. I wrapped mine around twice, but that is optional. Once is fine. Secure the end to the foam wreath with your glue gun or a floral pin.
- Begin gluing your plastic Easter eggs to the wreath. Be careful! The hot glue gun gets hot. I suggest doing a small section at a time and taking a break. We glued eggs to the top, front and inner portion of the wreath. I leave this up to you to decide how much coverage you want. It is a personal choice. This is the most time-consuming part. It took about an hour to completely glue all the eggs to the wreath.
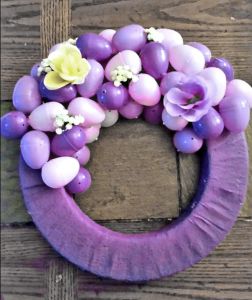
- You will have some small “holes” where the eggs your glues did not border each other completely. This is a suitable place to insert your flowers and greenery.
- Using your ribbon, measure a length suitable to hang on your door. We made ours about 22″. Glue the ends to the back of the wreath. If you like, make a bow to go at the top of the hanging ribbon. Now you are ready to hang your beautiful
 I wonder if the inventor of the hinged plastic egg imagined just how many arts and crafts they’d be used in over the years? It seems they are far more than colorful candy holders… at least in my house!
Kayla Domeyer
Latest posts by Kayla Domeyer (see all)
- Miniature Bohemian Style 1:12 Dollhouse Rattan Shelf - August 24, 2023
- How to Solve Stress with Princess Bathtub Melts - June 2, 2020
- 25 Valentines Even a Toddler Can Make - February 11, 2020