I’m happy to say that my little Squish is a helper. Hubby and I always hoped to include him in family errands and chores, in the everyday tasks that keep a home running. He’s only 18 months old but so far, so good! He loves to “pick up” the blankets and stuffed animals in his bed each morning, to put away his bath toys before getting out of the tub, and to wipe down the tables and high chair after a meal. Now – if only I can bottle his enthusiasm and save it for his later, more rebellious years.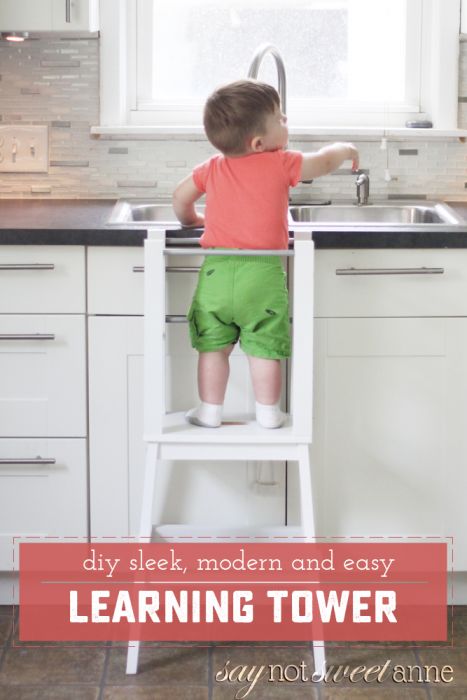
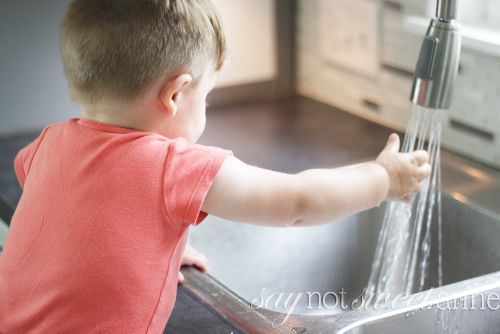
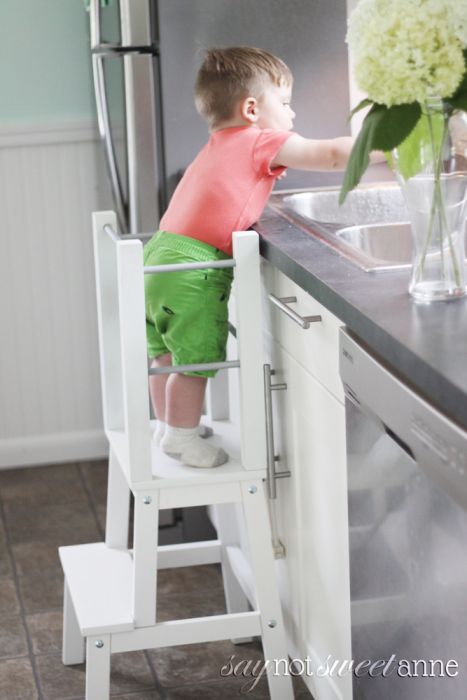
A big part of our routine these days includes this awesome learning tower, or montessori tower as some call it. It is the perfect height for Squish to reach the counter top, and it allows him to get up and down on his own but with an added saftey railing for those unsteady Toddler moments.
Hubby put ours together on a Saturday, and I am so pleased with how it turned out. We have a very small kitchen, and everything that lives in the space has to have not only a purpose, but an aesthetic. There is no room to hide away ugly things. So hubby made sure to build our DIY Learning tower with the same clean look and feel as our kitchen.
Squish and I love it!
What You Need:
- Ikea BEKVAM Step Stool. We used white for ours, but it comes unfinished as well.
- 2x2x8ft board
- 8 ft of 1/2in dowel
- Wood glue
- Screwdriver and screws
- 1/2in boring bit
- White and Silver Paint
How To Make It:
- Begin by cutting your 8ft 2×2 into 18in equal pieces. These are going to be your railings. Paint them white and set aside.
- Using your boring bit, drill 1/2inch deep holes for your dowels on each of your railings. We did two mirrored sets, as you can see in the sketch below. Height of the holes isn’t as important as making sure they match in height to their counterparts.
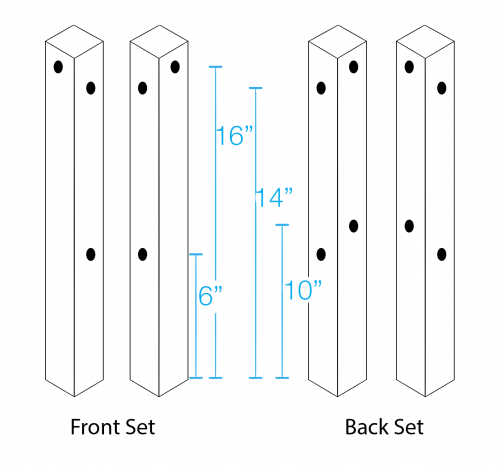
- Paint your dowels and let dry.
- Measure the width between your railings when they are held in place to the stool. Cut your dowel pieces 3/4″ longer than each gap. Use wood glue to secure each dowel piece to its appropriate set of holes.
- Locate the top plank of your Ikea stool. From underneath, screw a 2″ screw through the top plank and into the center of one of your railings. Use wood glue between the pieces as well for extra support. (Note – screwing into a board this way is sort of a cheap trick, I know. But It worked for us and I’m comfortable with its stability. If you are concerned, you can add a 2in L bracket to the foot of each railing post as well.)

- Assemble the rest of the stool according to the Ikea instructions and that’s it! Let all the glue dry, and make sure you check the stability before letting your toddler run away on it.
Kayla Domeyer
Latest posts by Kayla Domeyer (see all)
- Miniature Bohemian Style 1:12 Dollhouse Rattan Shelf - August 24, 2023
- How I made a DIY Prop Dragon Book (Twice!) - March 20, 2023
- How to Solve Stress with Princess Bathtub Melts - June 2, 2020
After much investigating I made a copy of yours today with a couple of alterations. I used 5/8″ hardwood dowels instead of 1/2″ and used 2 1/2″ by 1/4″ lag screws to secure the 4 posts to the top. I think it is stronger but still sleek. I also did not glue the posts to the top so I can detach the whole thing when little Quinn gets to big for it. Thanks for your great plan. It was the one for us.
Great idea to make the railing removable. Our little one still absolutely loves it, and as he’s getting bigger, he moves it all around the house to get into things… I can’t tell if that’s a parenting win or fail. LOL!
Thanks for the instructions! I put mine together today and unfortunately it was way too tall! Like a good 6 inches above counter height. I will have to take it apart again and try to cut it down to size. Are you sure you used an 8 ft board cut in 4 for the posts? Your hole drilling diagram also looks like your posts were 2 ft each, but your photos look much shorter.
Oh my goodness GWEN! I’m SO SORRY! You are totally right, ours are only 18in. I TOTALLY messed up in the instructions. I’ll fix it right away and I’m so sorry for the trouble!
I’m just wondering if the measurement on the post are big accurate before we attempt this DYI?
Hey Sandy! Yes, 18in equal pieces for the posts is correct. Thanks for checking!
What a clever idea! I love that the kiddos can climb up and down by themselves. Thanks for the great share!