Today’s post is super special, guest written by Amy from One Artsy Mama! You can check out my guest post on her blog here!

Hi! I’m Amy, otherwise known as One Artsy Mama. I’ve been married to my best friend and dance partner for almost ten years,
and I’m mama to an adorable 3-year-old {my “Little Crafter”} who keeps me on my toes.I love artsy-craftsy things of all kinds, and I am happiest when I’m creating something. I’m excited to be here at Sweet Anne Designs today and to share a project with you! Thanks, Kayla, for sharing your blog with me {and for posting your fun ideas on mine!}So, I know it’s still October, but Kayla and I both agree thatit’s never too early for Christmas!
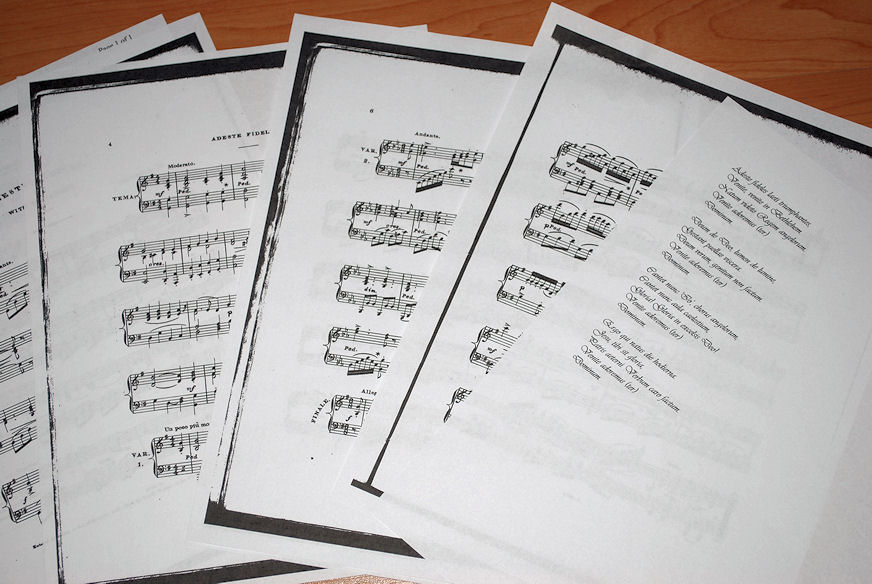
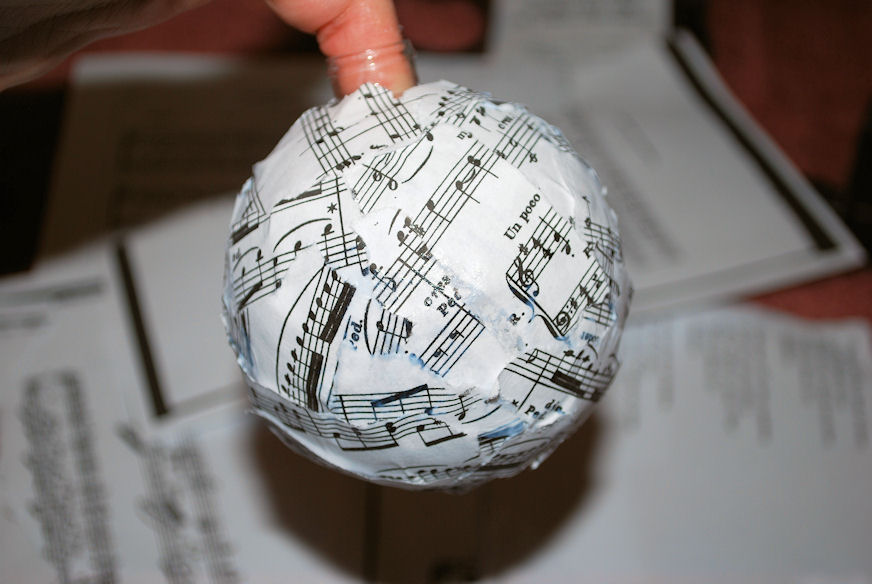
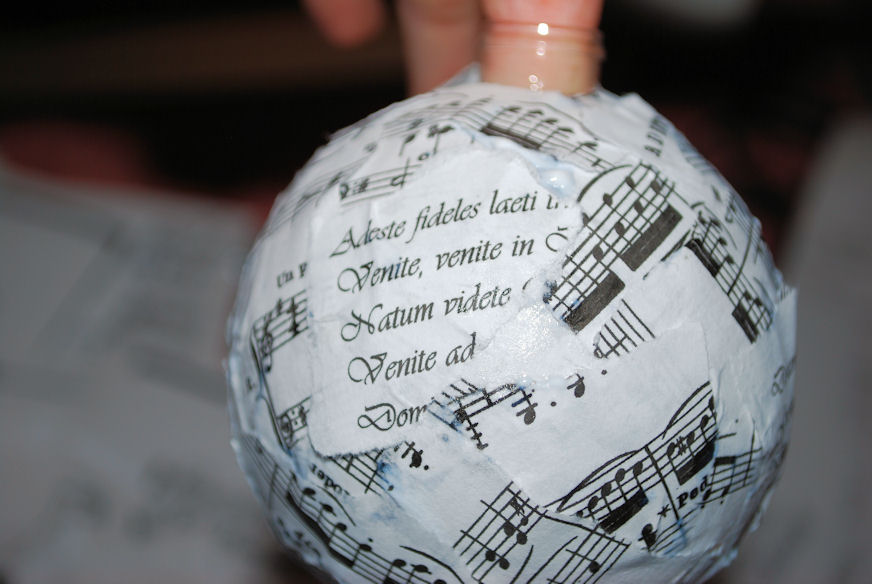
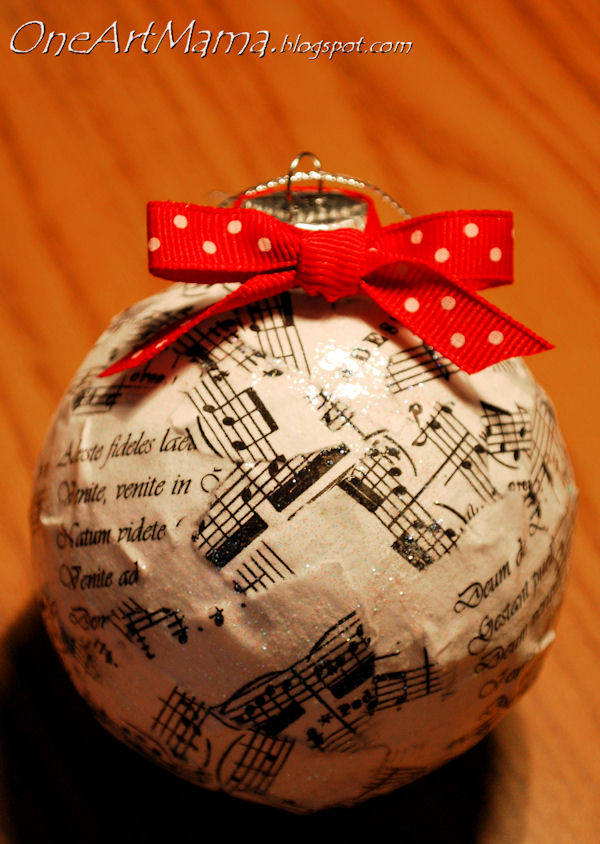
Especially if you happen to be an artsy gal like us. When you make a lot of your decorations, cards, and gifts yourself, you have to get an early start if you want to be done in time to really enjoy the holiday season.One of the first projects I tackled for this year was a sheet music ornament. I had seen something similar on Pinterest using the text from the Christmas story in the Bible, but something in me just couldn’t bear to rip up those precious words. Instead, being a music lover, I made my own version using the music and lyrics to “Adeste Fidelis,” aka “O Come All Ye Faithful.” Here’s how I did it…and how you can too!Sheet Music OrnamentMaterials:– clear plastic ornament {I guess you could do it with a colored one too; it gets all covered anyway}– Mod Podge Glossy finish {I love this stuff}– paint brush– sheet music and lyrics for Christmas carol of your choice, or any printed document– glitter!– ribbonSTEP 1: Gently tear your sheet music and lyrics into small pieces, ripping toward yourself for neater edges. As a side note, I just searched online for free piano sheet music and printed it out; there’s a ton of it out there. For the lyrics, I copied them from Wikipedia, then pasted them into a Word document and changed the font to make them a little fancy.STEP 2: Remove ornament topper and paint some Mod Podge onto the ornament. Begin layering your sheet music on top to cover the surface. Smaller pieces are better so they don’t get too wrinkly.
STEP 3: Continue until entire ball is covered.STEP 4: Layer some of your lyric pieces on top so you have a nice mix of words and music.
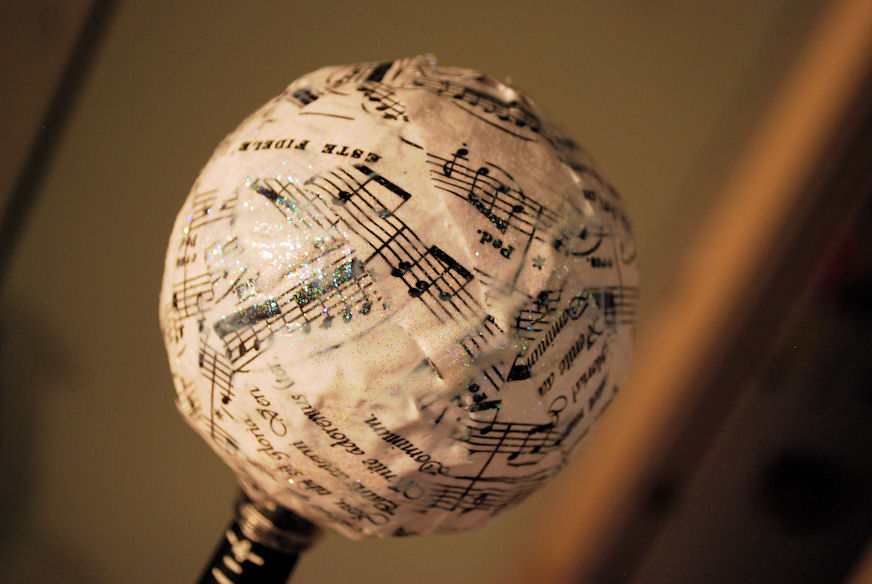
STEP 5: Paint Mod Podge over entire surface of ornament to give it a glossy finish. While still wet, sprinkle glitter {yay, my favorite part!!} all over it. Let it dry. To dry mine, I stuck it on my ring mandrel and put the ring mandrel in an empty baby bottle…yeah, I know…totally ghetto-rigged. But it worked!STEP 6: Replace ornament topper {you can glitter that too!}. Tie ribbon around top and make a bow. Enjoy!What do you think? It’s easy, it’s cheap {the ornaments only cost about $1 at Michaels}, and you can personalize it with your favorite song. And if you just can’t get enough of sheet music, check out this ring in my Etsy shop!Thanks again for the chance to share this project with you! I’d love for you to come visit One Artsy Mama sometime! I enjoy making new friends and sharing crafty inspirations.Happy Crafting,


The following two tabs change content below.

Kayla Domeyer
My name is Kayla and I am an Artist and Graphic Designer. That means that I love pretty things, and also that I like to make free printables! I'm so happy that you've stopped by to visit my blog, and I hope you find something interesting here. In the past 15 years since I started the site, I bought a house, had two children, and shifted careers. My focus now is more about sharing and less about the daily grind.
Latest posts by Kayla Domeyer (see all)
- Miniature Bohemian Style 1:12 Dollhouse Rattan Shelf - August 24, 2023
- How I made a DIY Prop Dragon Book (Twice!) - March 20, 2023
- How to Solve Stress with Princess Bathtub Melts - June 2, 2020
Hi Amy, those litle ornaments look amazing, especially for a music lover! I might try to put different bells in them for different notes of sound. That might be an idea!
I love this ornament idea!
Beautiful ornament! I loved your guest post on Amy’s blog too! I’m so gonna make my own notepads!! Thanks so much for linking up to Whatever Wednesday – it was great to have you!
Jamie
For Love of Cupcakes
Saw you post on One Artsy Mama. Great job!