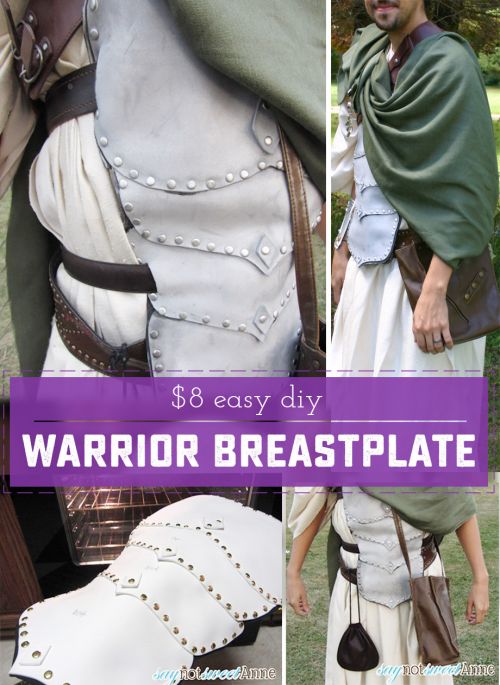
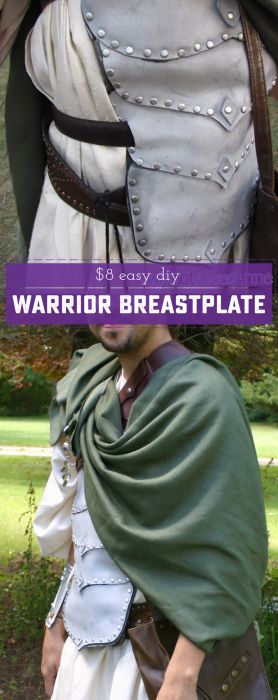
My name is Kayla, and I like to make things. Sometimes, I feel compelled to make things last minute. Sometimes, when its inconvenient. This time, I made a DIY Warrior Costume Breastplate at my mom’s house, at 11pm, the day before I needed it.
Let me explain. We were staying at my mother’s home on a Saturday. Sunday, my siblings, hubby and I were headed to the Renaissance Faire. My brother had just tried on his awesome Knight costume, and my husband tried on his “warrior priest” garb. It was a combination of long flowing robes and belts, and I was pleased with it. (Dually pleased since all I did was buy some fabric and throw some belts on it). So, hubby tried it on and went to show my brother.
Who laughed.
For at LEAST 20 seconds. And then exclaimed that he didn’t know what the costume was supposed to be.
Now, I know my brother didn’t mean anything by it (and I forgive you Kyle!) but that made me feel like the costume was inadequate. (I wonder why?) I dragged my hubby out into the cold late night to look at Walmart, the only store open in my home town, to see if we could find a costume breastplate he could wear.
We looked through both adults AND kids, to no avail. There wasn’t a single warrior costume in the bunch. So, on a whim, we wandered through the craft aisle. I hadn’t brought any supplies with me. Why would I? I didn’t plan to make a costume while at my mother’s house, so my options were limited to what I could buy that night.
I walked out of the store after spending $8. Then, I made this awesome costume warrior breastplate.
It really only took me about an hour total. I surprised myself with this one, I was so tickled at how well it turned out, and hubby’s costume did look MUCH better with it.
What I Used:
- Craft Foam $4 (Large sheets of that colorful foam stuff.)
- Brads $2 (We scoured the store for these. They were in with the office supplies.)
- Silver Metallic Spray Paint $2 (they had little mini cans in the craft aisle. One was enough.)
- Glue and scissors (My sister had some on hand)
How I Made it:
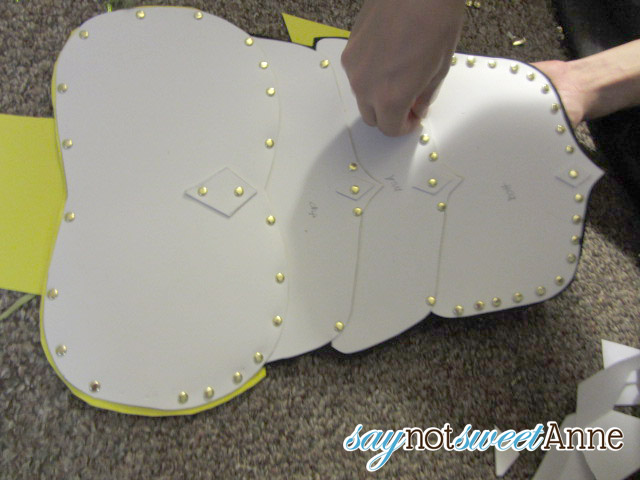
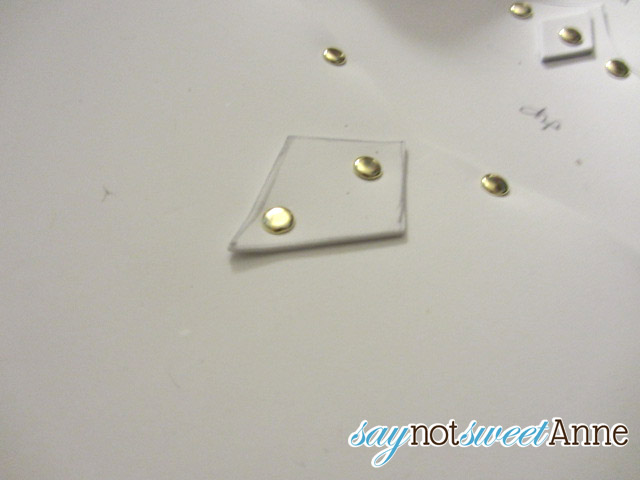
- First, I sketched out the shape of the panels I wanted. They were pretty much hearts with the round humps cut off.
- Cut 4 panels out of the foam, making each one slightly narrower.
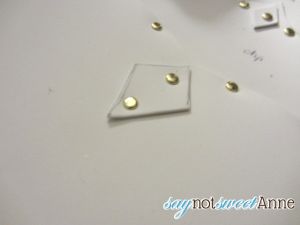
- Glue the panels onto one of the large sheets. If it needs to be sturdier (ours did) Add a second backing piece of foam, gluing them all. You can see we used white foam for the panels, yellow for the first layer on the back and black for the final layer on the back. We also glued on some embellishment foam pieces.

- Add lots and lots of brads. Our went all the way through all three sheets of foam.
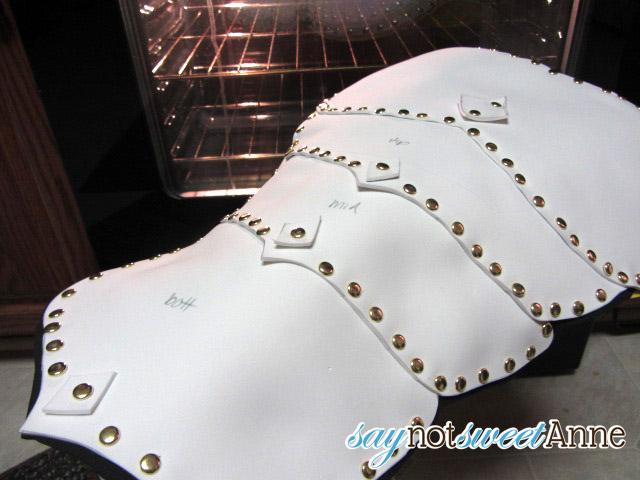
- Once the glue is dry, preheat your oven to 200° and place the foam inside. WATCH IT. For me it only took about a minute to see that the foam was relaxing, and starting to curl up in the small areas. Quickly remove the piece and shape it. You don’t have much time to shape before it will cool, but I was able to get a nice, round chest shape.
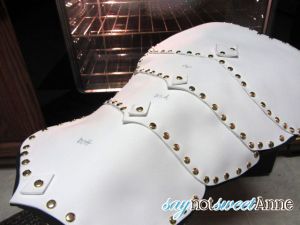

- Finally, I hit it with that silver metallic spray paint. After that, I was off to bed.
- The next morning, hubby cut two slits in the piece and slid a couple of belts through. We used those to hold the piece up on his costume.


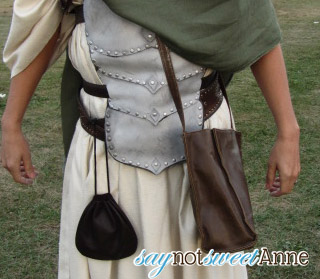
All in all I think we did a GREAT job for a last minute-late-night-guests-at-someone-elses-house project. It held up all day at the Renaissance Festival, and I’m already brainstorming new things we can make with this technique!
My brother’s costume was equally as awesome!
Kayla Domeyer
Latest posts by Kayla Domeyer (see all)
- Miniature Bohemian Style 1:12 Dollhouse Rattan Shelf - August 24, 2023
- How I made a DIY Prop Dragon Book (Twice!) - March 20, 2023
- How to Solve Stress with Princess Bathtub Melts - June 2, 2020
Did you use hot glue? Or what kind of glue? This is so awesome!!!!!
Just regular elmer’s glue. I think hot glue might melt in the oven. Good luck Misty!
Use a hear gun, or hair dryer if at a friend’s house, to help shape foam! It is amazing! I made holsters for my daughter’s costume last year. You can use spray rubber to make it look like leather, too. 🙂
Great thinking!
These ideas are excellent!
I love this so much! I’m going to see what I can do with helmets, etc. as well.
I bet you could do a lot! I would start with a fabric cap, and then you could use the brads to secure the foam the fabric!