
When my in-laws moved out of my husband’s childhood home a few years ago, (speaking of, did you see my father’s day card for my Father in-law at Somewhat Simple? Check it out!!), we were sure to grab a few treasures. Among them was this neat storage chest. Its origins are unknown, but it was in their barn attic for several years. From there, it went into “storage” (AKA my mom’s basement) for another few. Until now.
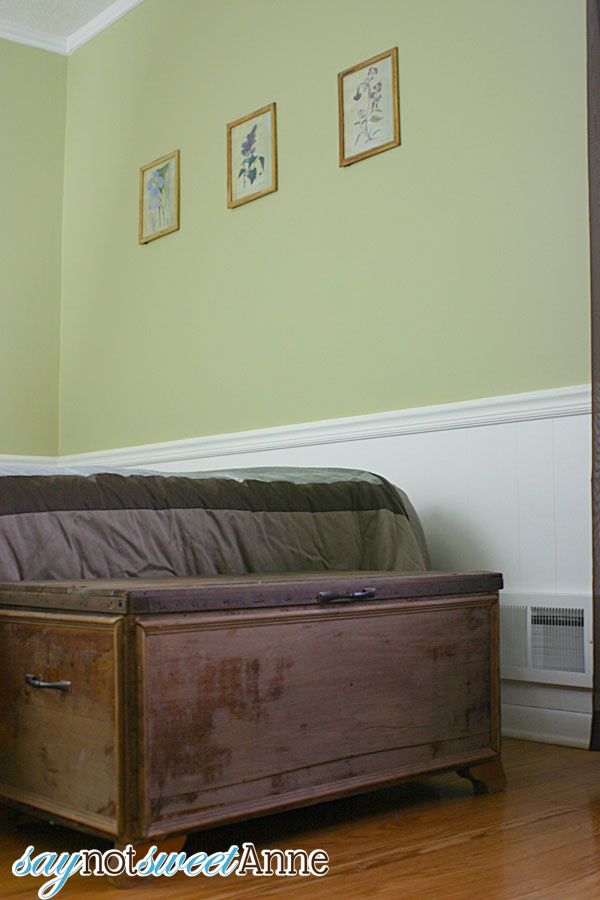
In my imagination a guest room isn’t a guest room without a chest at the foot of the bed. I don’t know if its Pinterest, magazines or Martha that has driven this image into my head, but I can’t shake it. So, when we started prepping things for Our New House, I knew that the chest was going to go in it.
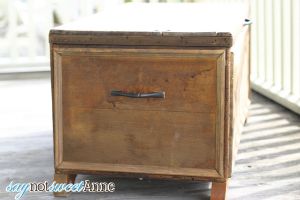
Trouble is, it was ugly.
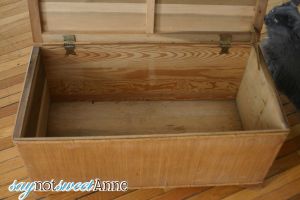
It had been varnished at some point, which had faded and dry-aged to a flaky substance on the top. It also had some faux-wicker grass material wrapped all the way around and secured with glue. We knew it needed some love. So, we started planning. I knew I wanted it to look old. I also knew that I didn’t want to spend hours trying to faux paint it to look old. So, I went the all natural chemical reaction route. After some research I decided to try and artificially age the wood.
I think it turned out GREAT! And don’t worry about the vinegar, the smell dissipates quickly. =D
What You Need:
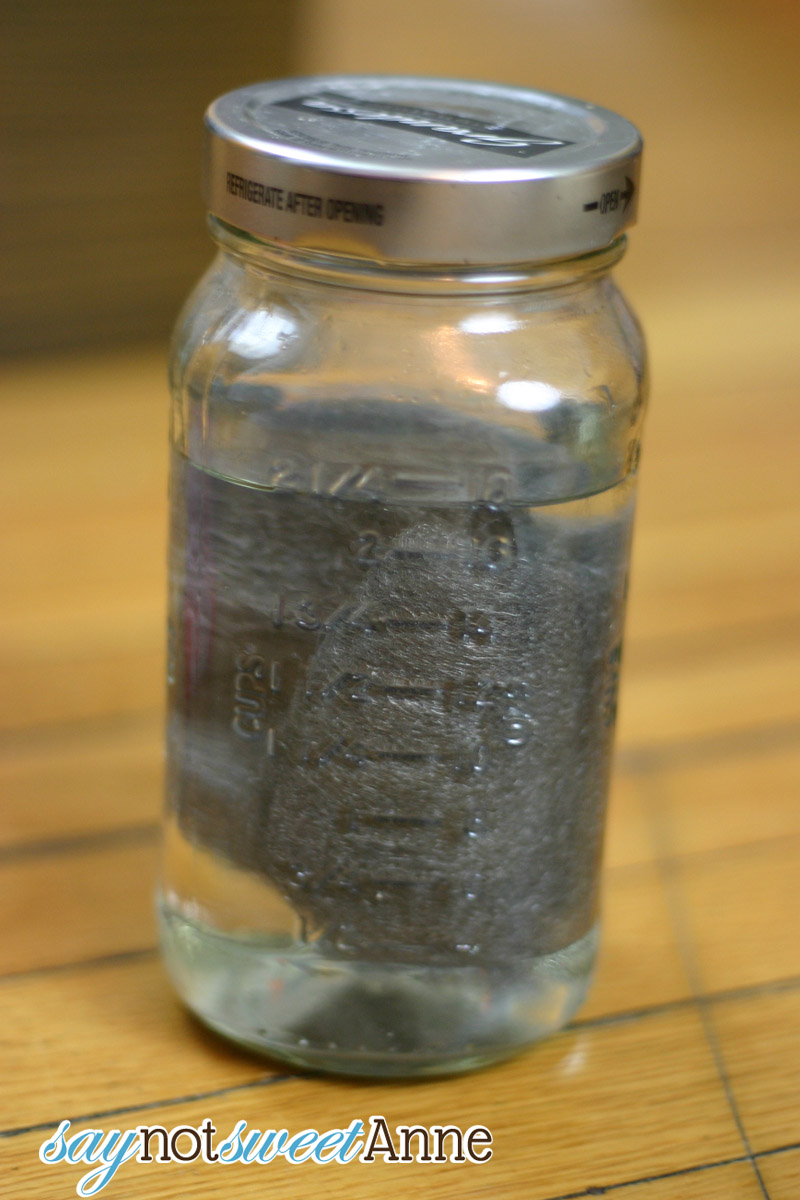
- Glass Jar
- Paintbrush
- Fine Steel Wool (NOT the stainless kind!!)
- White vinegar
- Black Tea (optional)
- Wood, board, box etc to use it all on!
How To Make It:
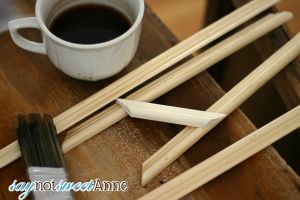
- A few days before you are ready to “stain” the wood, tear up a pad of steel wool and place it in a glass jar with white vinegar. Make sure not to screw the lid on all the way, this little bugger will build some pressure. (I don’t dilute at this point in the process. Straight up approx 2 cups vinegar.)
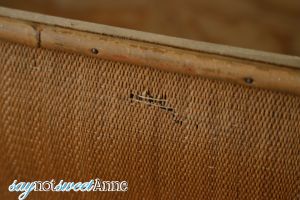
- Wait a couple of days. Sometimes the mixture will change color. Other times it just looks like vinegar. Now you’ve got an oxidizing solution- as I call it “Almost Instant Weathered Wood Stain”.Use this time to sand and prep your piece. We scraped off that grass fabric and as much of its glue as we could. Then we did a rough sand to prep for the solution.
- Give your solution a test by dipping some bare wood in it. For our chest, we decided to add some molding details and I tested the solution with one of those.
The top test is 3 dips in the straight solution.
The second test is 2 dips in a diluted (approx 1/2 cup more vinegar) solution (which makes the result gray-er)
The bottom test is one dip in a pretty diluted version (an additional 1/2 cup vinegar). I was aiming for gray, not brown- so this was my favorite.
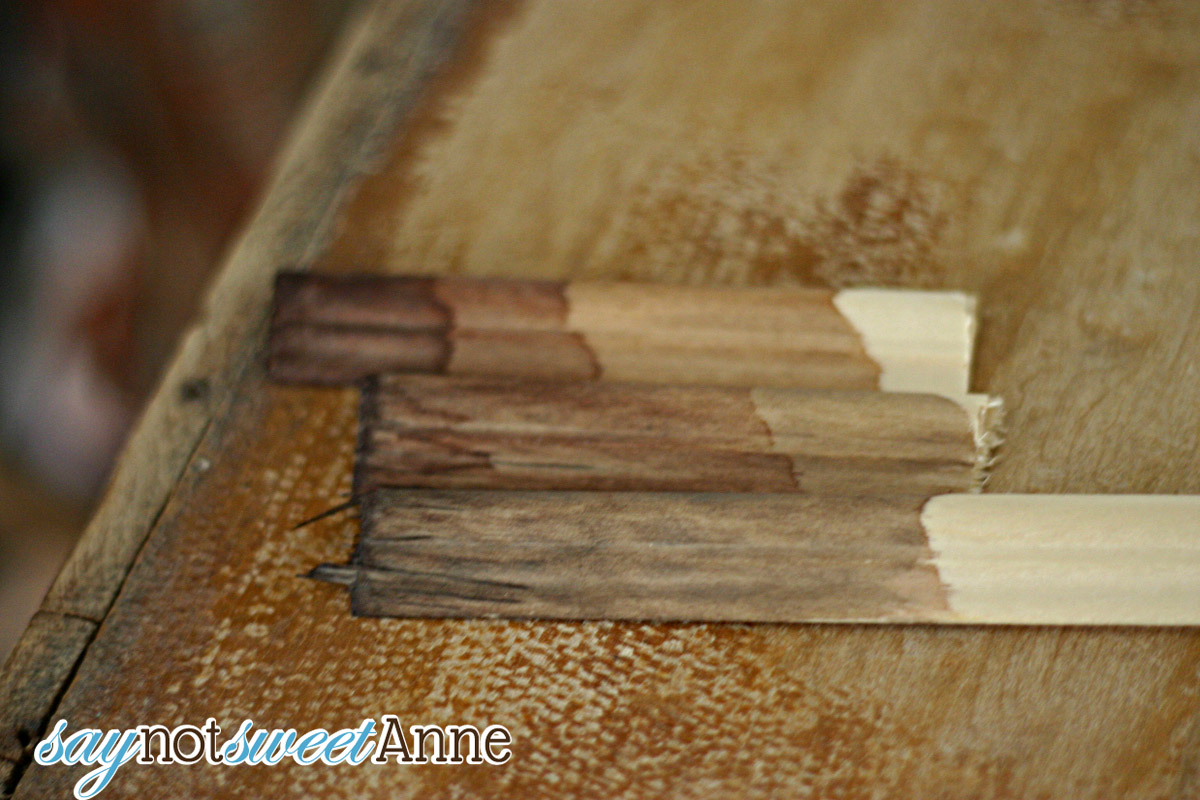
- Keep in mind that there are a variety of factors that might affect how the solution colors your wood. The solution reacts with the tannin in the wood. Some wood has more tannin than others. According to The Friendly Home, strong black tea is full of tannin, and adding it to the wood will help the solution change the wood color. In my case, the chest took the color really well, but that fresh new wood molding did not. So, I slathered the molding in tea before I attached it to the wood.
Molding After Tea 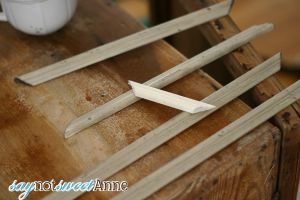
Molding after Oxidizing solution -
Up next was adding the molding to the chest and then using the solution on the chest itself. This stuff is so crazy when it goes on. Its sort of like invisible ink – in reverse. You put it on and it looks like you’re just getting the wood wet. Then suddenly, color! And the color matures and deepens over a few hours. Its a really neat process.

Oxidized molding on the chest. Testing the mixture in the upper right corner. 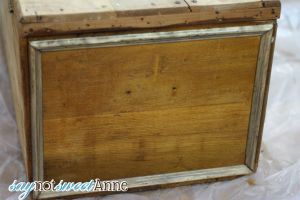
Chest and molding seconds after one coat of solution. 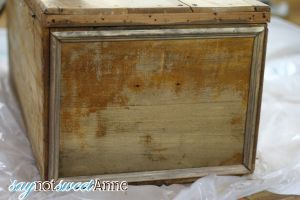
Chest and molding a few minutes after that application. - All in all the molding got 4 coats and the rest of the chest got 3. I kept the leftover solution and just pulled it out the other day. It had gotten REALLY strong, so I diluted it further but its still good!
- Finally, the chest got some new handles and pretty shelf liner on the inside. You can’t tell its the same wooden box!
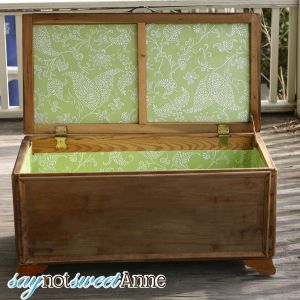
I love my Weathered Wood Stain, and the chest fits right in with my guestroom. Oops! Sneak peek! ;D More on that later…
Kayla Domeyer
Latest posts by Kayla Domeyer (see all)
- Miniature Bohemian Style 1:12 Dollhouse Rattan Shelf - August 24, 2023
- How I made a DIY Prop Dragon Book (Twice!) - March 20, 2023
- How to Solve Stress with Princess Bathtub Melts - June 2, 2020
Great tutorial. I like the way you dilute to change the shades. Mine always comes out brown.
By the way the concoction is a “mordant”. We use it to age wood, but in history it was used to prep wood before applying a dye or stain.
Wow, thanks for the info Steve!
looking for aging techniques and came across this article. I’ll try it on some projects I am building. Thanks
The chest looks pretty cool. I would never have thought of using tea on wood before.
Kayla,
Love the blog and fantastic project! Well done and thanks for the great descriptionns/pictures for the stain.