Let’s face it. Not every pretty thing fits in an 8×10 frame. Heck, not all of them are a proportional rectangle. Some are square, some are wide and squat, some are tall and skinny.
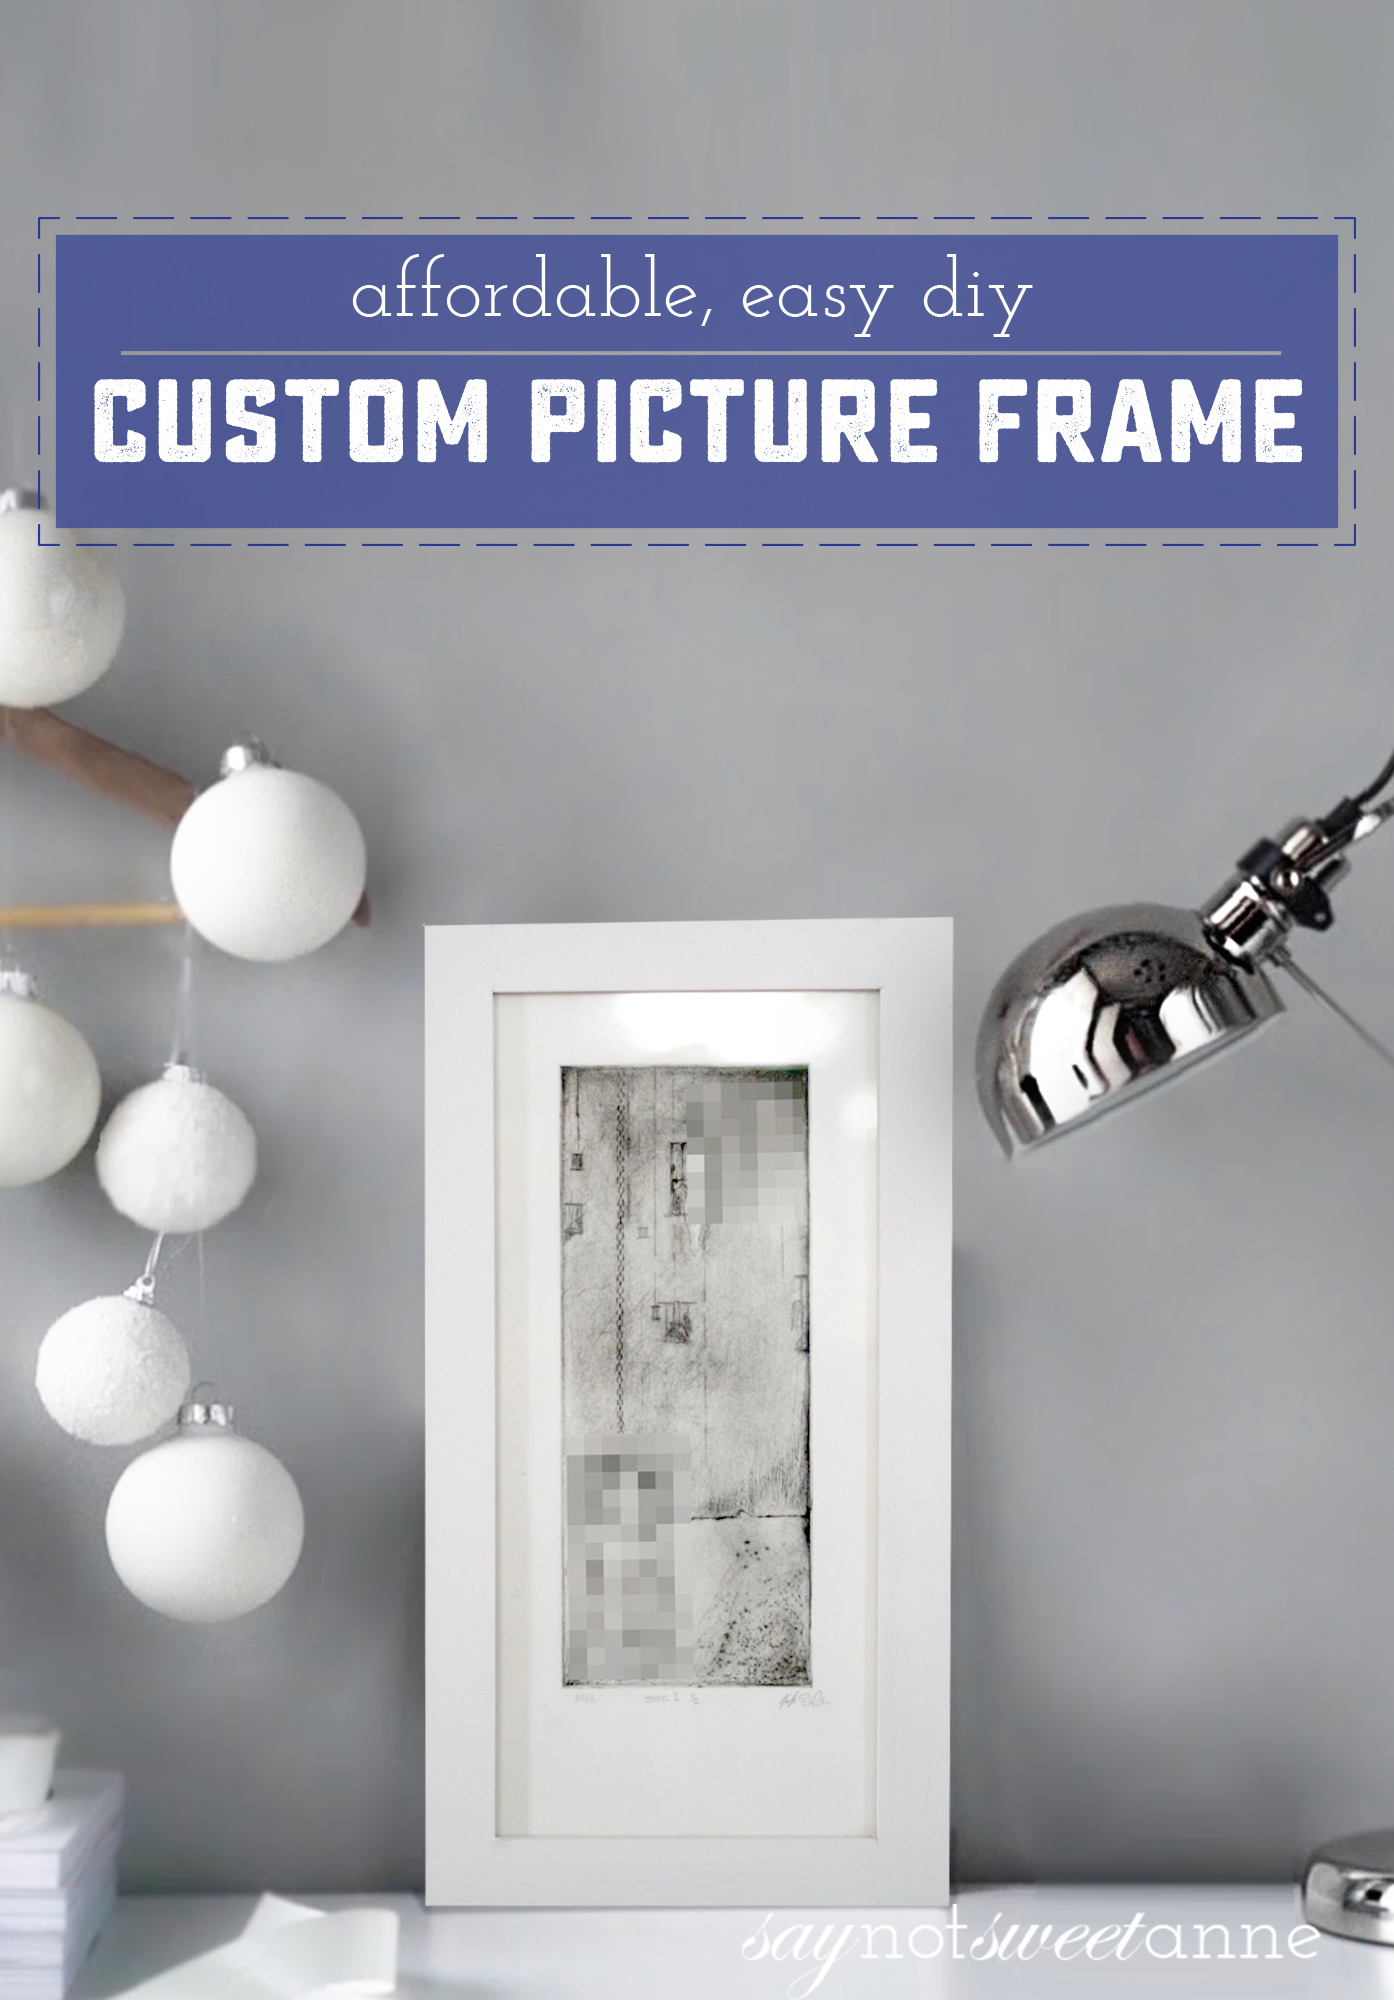
I’ve had this beautiful art print for years that I just haven’t been able to find a frame for (I blurred bits of it for copyright stuff). It’s a strange size and since I wasn’t going to have it custom framed for a small fortune, it has been sequestered to a box in a closet. Recently, I resolved to figure out how to build a picture frame for that lovely print, and I’m so glad I did! As a result I was able to build a picture frame that showcases my lovely print.
Really, making my own DIY picture frame was SO easy and actually cheaper than buying a frame at a department store. And there’s a bonus; some of the screws and such I bought are left over, and I can make another frame if I just get more molding and glass. I KNOW I will be using this little trick again!
The basic premise is to stack molding to substitute the routered groove that the back of most frames have. My molding was about 40 cents a foot. I know there is such a thing as picture molding, that has that routered groove built in. I wasn’t able to find any, so I improvised!
What You Need:
- Hand saw and miter box (This helped me cut straight. Also, if you are so inclined, you can make 45 degree angles on the corners with this)
- Wood glue
- Heavy duty stapler and 1/2 inch staples
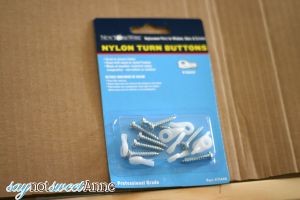
- Turn buttons (You might find these near the glass section at your hardware store. I got mine on Amazon.)
- Screws, if those with your Turn Buttons are too long.
- Picture mounting brackets
- Cardboard for backing
- Glass or plexi (I hear Lowes will cut the glass you buy there. I cut mine myself. 14×16 inches was $4)
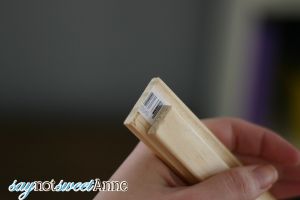
- A length of a wide flat molding.
- A length of a less wide flat molding.
How To Make It:
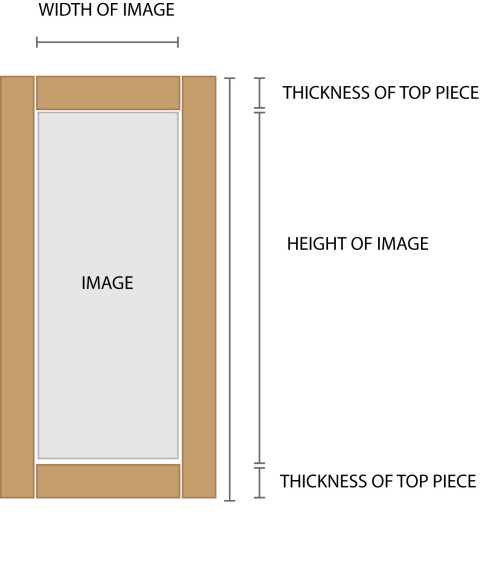
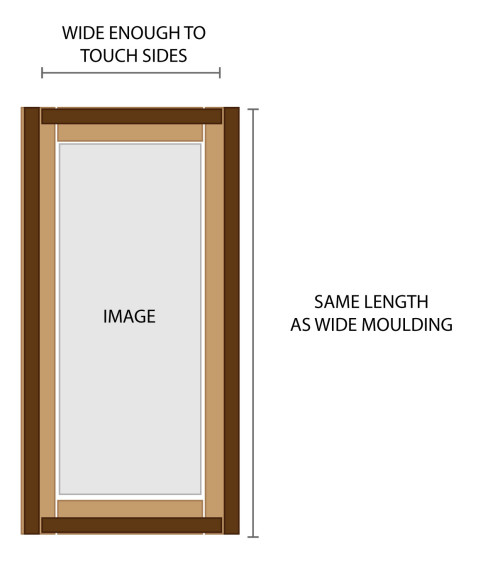
- First of all, calculate the WIDER molding. The way we’re going to be doing it, the top pieces are as long as you image is wide. The side pieces are the length of the image PLUS the thickness of the top pieces. The diagram below shows it better.
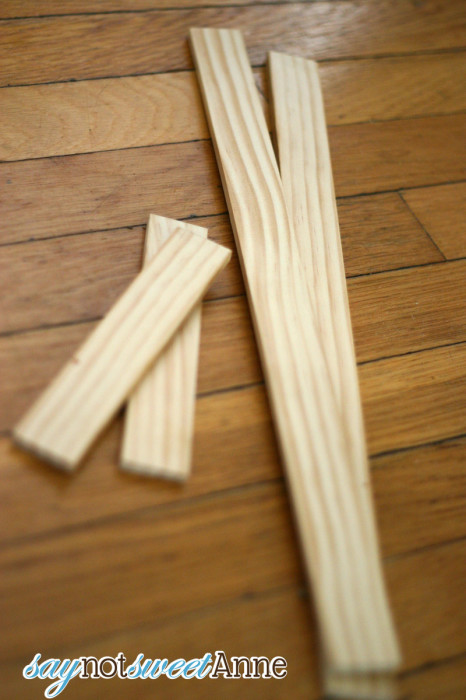
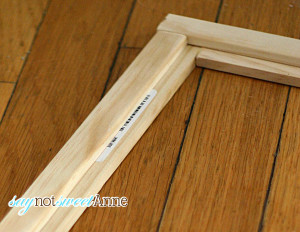
- Cut your wide molding to length using the miter box and hand saw. Sand all edges a bit to make sure they look polished.
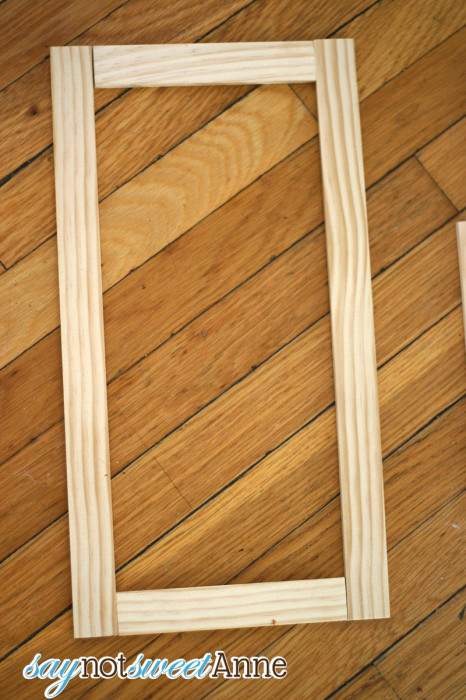
- Glue edge to edge in the formation shown in the diagram and in the photo below. Let dry.
- In addition to the wider molding – we’re going to use a narrower piece on top. The long pieces will be the same as they were for the wide molding, but your top and bottom pieces will have to make up the difference in thickness. I just held it up to the glued wider frame and marked it. I did this the reverse way on mine, but I think this way is better. Do as I say not as I do!!
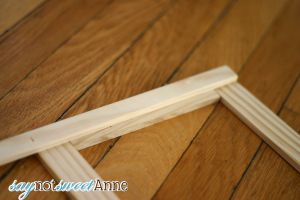
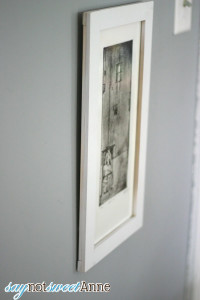
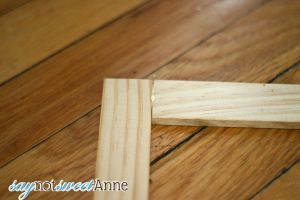
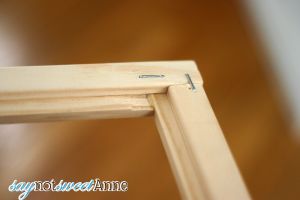
- Glue the narrower molding pieces to the edge of the wide frame. This leaves an inset area in the middle for the glass and backing to rest. Use the staple gun to staple across the joints. My staples went through the narrow molding a little bit into the wide molding without going all the way through (1/2 inch staples)
- Color your frame however you like. I used white flat spray paint.
- Place clean glass in the inset. Put image on top as in a normal frame.
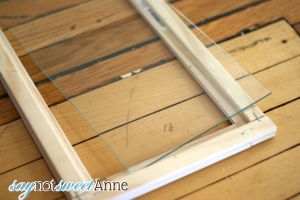
- Cut a piece of cardboard to work as the backer for the whole thing.

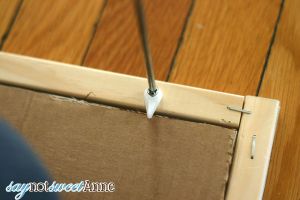
- Install the turn buttons. The screws mine came with were too long, so I had to use shorter. These allows you to change the picture, clean the glass etc and then put everything back.
- I used a “self leveling” picture hanger to hold my frame up to the wall.

And That’s it!! All in all this project took very little time and I am SO HAPPY to finally have this piece framed!! Now I don’t have to fuss about buying great finds from the local art students or artists, since I can frame them at home!
Kayla Domeyer
Latest posts by Kayla Domeyer (see all)
- Miniature Bohemian Style 1:12 Dollhouse Rattan Shelf - August 24, 2023
- How I made a DIY Prop Dragon Book (Twice!) - March 20, 2023
- How to Solve Stress with Princess Bathtub Melts - June 2, 2020
Frames on art really adds up to the beauty of it. It makes it more appealing and easy to decorate.
Frames on art really adds up to the beauty of it. It makes it more appealing and easy to decorate.
Nice frames. I like the design and the simplicity but still really appealing. Great.
Personalizing your home or workspace with custom framing is a great way to express your personality and to enjoy your surroundings. While others can go to the store and buy the same sofa, tables and lamps that you have, it is highly unlikely anyone will ever have the exact same custom framing as you.
This kind of frames are really nice and adds some really cool effect on the thing you’re gonna frame.
Frames adds more beauty and sophistication in the display. It is also a good design.
Personalizing your home or workspace with custom framing is a great way to express your personality and to enjoy your surroundings. While others can go to the store and buy the same sofa, tables and lamps that you have, it is highly unlikely anyone will ever have the exact same custom framing as you.
Thank you…exactly the instructions I was looking for!
Hi Kayla
What paint did you use? And did you use a varnish?
Kind regards
Nikita
I just hit it with some high gloss white. No varnish. Hope that helps!
I am also a graphic designer and appreciate beautiful works, but don’t much care for some of the cost involved in beautifying my home.
Been looking for something like this for a while now. This method looks really good, simple yet effective. Awesome!
Just wondering about the glass aspect, I may have missed it in your blog but maybe you could tell me again how I can source affordable glass for projects like this … thanks in advance
Thank you for sharing this tutorial! Pinning it now 🙂
Very nice job! Just a quick note – if the work you are framing is of any value, you may choose to use a proper foamcore backing and a mat.
The cardboard is very acidic and will quickly yellow the art, also a mat will prevent the art from possibly sticking to the glass.
Thanks for the great ideas!
Rachel,
You are so right! I should put a disclaimer that this is NOT archival framing. However, I think for the average person, if archival is what you’re going for, professional framing the way to go. There is a significant investment in archival tape, mats, mat cutters, acid barrier frames and UV resistant glass.
I take a lot of pictures and buying frames can get expensive. Thanks for this, I’m trying it soon.
SO gorge! and you make it look easy:)
It IS easy! I’m going to make SO MANY of these!
Having made picture frames professionally I admire your ingenuity and do agree special built frames are way too expensive. I do have some advice to share, paper products and cardboard are manufactured with acid and can cause damage to your artwork, I would suggest using other materials for a backing or perhaps even placing a plastic barrier between your cardboard backing. Good luck, now you have many followers!
Hey Bill!
As I said in another comment, I am aware that this is not archival quality framing. However, I think for the average person, if archival is what you’re going for, professional framing the way to go. There is a significant investment in archival tape, mats, mat cutters, acid barrier frames and UV resistant glass.
That said, I did add a note to the actual post in case someone doesn’t read down into the comments. =D
You make it look so easy Kayla! It turned out beautifully!