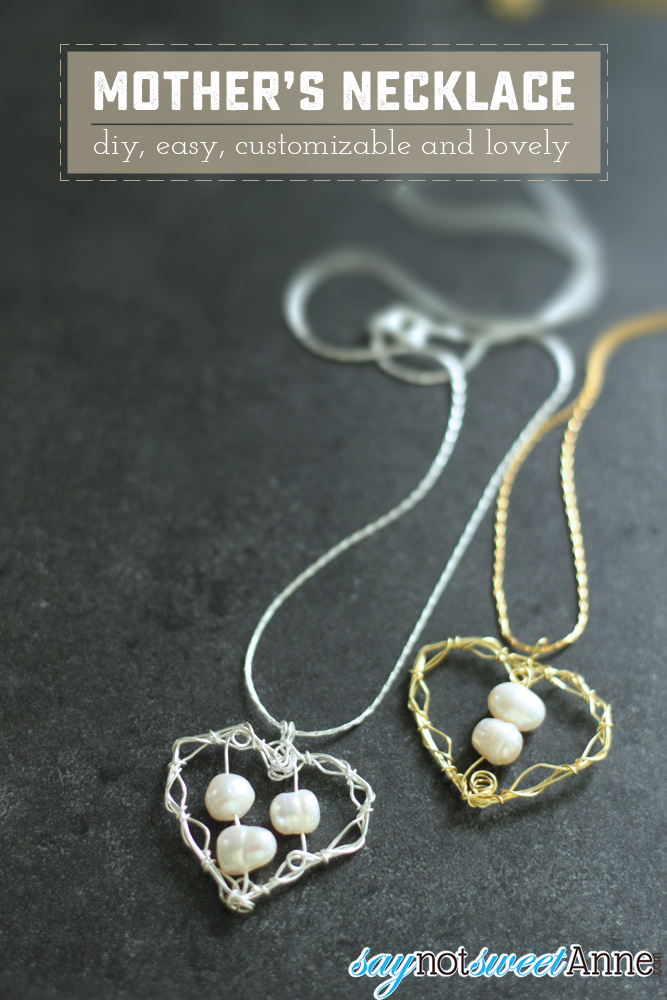
As many of you might have picked up on, Hubby and I are expecting our first child. In fact, as I write this I am 4 days past my due date. The journey we’ve embarked on from a husband and wife to a father and mother has been an amazing one. There have been plenty of surprises, plenty of fears, adjustments, sacrifices and so much joy. With our impending parenthood in mind, this Mother’s Day has taken on a new light for me. I am more grateful for the wonderful mothers in my life than I have ever been. With Mother’s Day coming up, I’ve been looking for a Mother’s Day Gift, specifically a Mother’s Necklace.
I want to raise the bar. Sure, I’ve done some cool things for mothers day before, like the Printable Mommy Bucks or the Handprint Dish. Even a pretty Mother’s Day printable cards. But this year, I wanted something that wasn’t just sentimental. I wanted to make something to cherish, something that would be around for years to come, that my mother could wear and think of me and how much I love her.
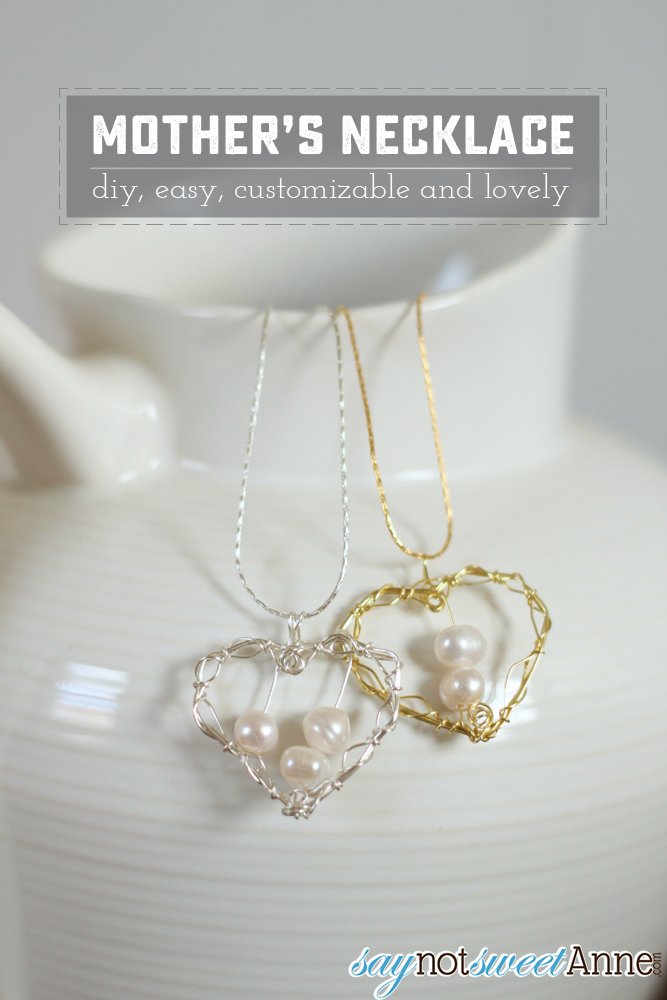
So, after some thinking, this is what I came up with. I cannot stress how pleased I am with the way that they came out. I’m not a very good jewelry maker, but with this method I was able to make to beautiful pieces that I am proud to give away. So even if jewelry isn’t your thing, I suggest you give this a shot!
What You Need:
- Sterling silver wire, or gold plated wire about 26 gauge. You could go a little heavier but it might not be as easy to work with.
- Sterling Silver or gold chain
- Freshwater pearls, pearls, or beads of your choice
- Nails
- Hammer
- Scrap Board
- Jewelry pliers, or small fine pliers
How To Make It:
- Pound the nails into your scrap board in the pattern shown in the picture. Don’t pound them too far because you’ll be pulling them out at the end.
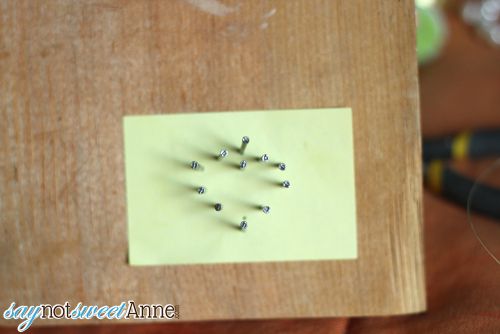
- Begin by cutting your wire to about 24-28 inches. Turn the end of it into a loop and loop over the bottom nail.
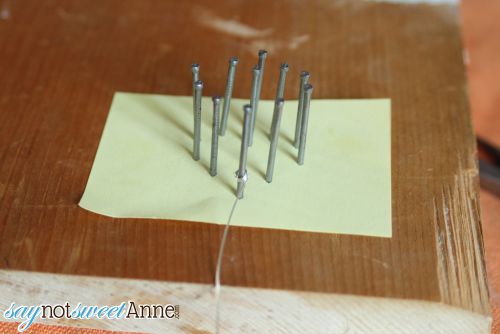
- We are going to layer with the wire. First thread it around the nails going around all the nails. Take care to include the top nail at least once. This is where your chain will go through.
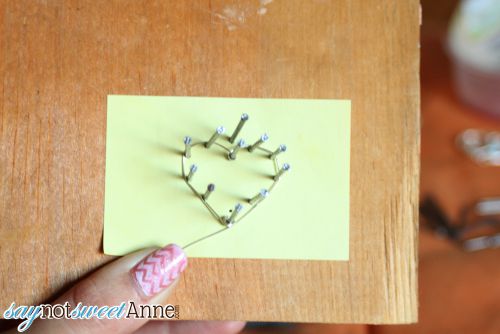
- Thread the wire around the heart again, going in and out around every other nail.
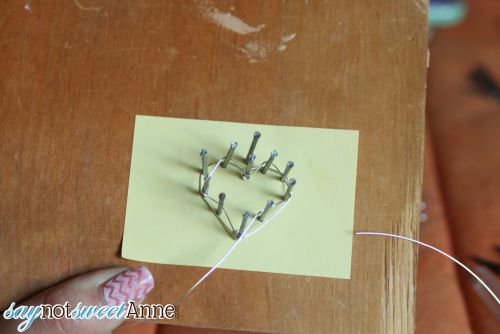
- Now, thread it again, but go around the opposite nails as last time.
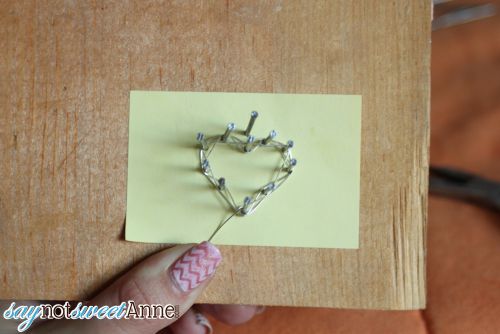
- Now go around the whole heart. Stop near the bottom and thread across the heart. This is where you will put some of the beads.
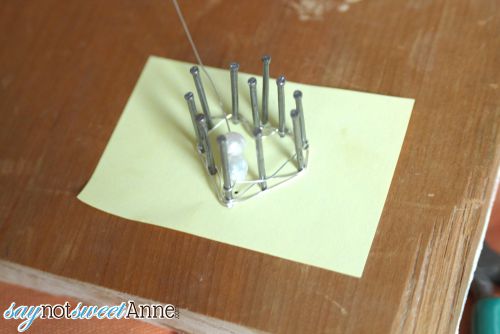
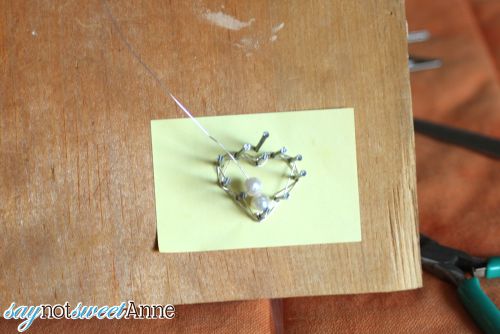
- Turn the wire around and return to the opposite side, adding more beads if needed. (If you don’t need more beads, skip this step.)

- Complete the loop around the heart.
- Now go around looping the wire around all of the wires between each nail. This is what will hold them all together. Loop twice, then move to the next gap. Loop twice and repeat.
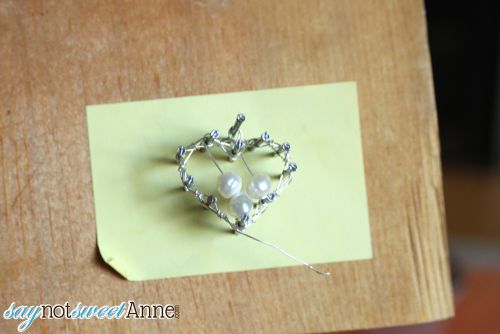
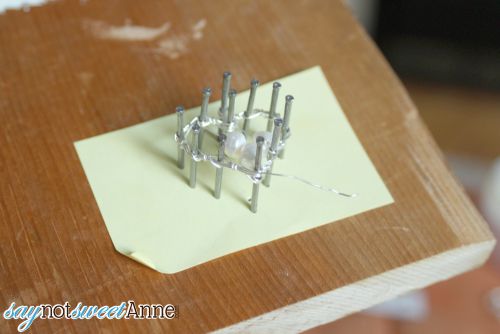
- When you have gone all the way around, clip your wire and tuck the end into the loop you created in step 2. Be sure to crimp it under so that there isn’t any sharp edges.
- Remove all of the nails, and thread your chain through the loop at the top.
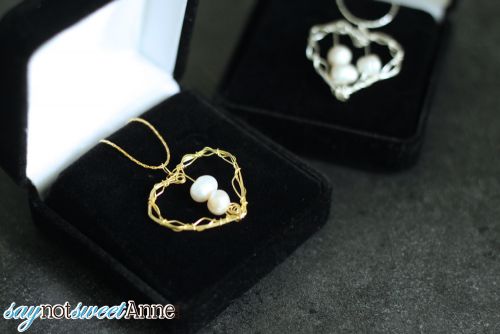
Done! Look at how lovely the hearts turned out! I made the second pendant by putting the nails back in their holes and repeating the steps. You could experiment with any number of combinations or ways of threading in and out of the nails. As long as your loop the wire to secure everything at the end, it should stay together.
Kayla Domeyer
Latest posts by Kayla Domeyer (see all)
- Miniature Bohemian Style 1:12 Dollhouse Rattan Shelf - August 24, 2023
- How I made a DIY Prop Dragon Book (Twice!) - March 20, 2023
- How to Solve Stress with Princess Bathtub Melts - June 2, 2020




this is really cute, thank you!