Why is it my favorite things are always the cheapest? Favorite gift? Craft supplies. Diamonds are nice, but craft stuff is more useful. My favorite restaurant? My kitchen. Favorite chair? That cheap $90 number we bought when we first moved out on our own.
I suppose I should be grateful I have inexpensive tastes. Especially since rocking chairs can cost a pretty penny. Hubby and I spent a LOT of time scouring Craigslist, eBay, thrift stores and furniture deals for months before we decided we just plain didn’t like anything. For a while I thought our baby’s room was going to be left with an empty corner and no chair at all.
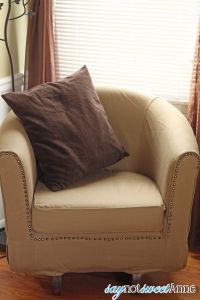
Then we saw this interesting post where Julie took an Ektorp Tullsta and made it into a rocking chair. Of course, it isn’t really a tutorial. But it got us thinking. You see, for about 7 years we’ve hauled around a beat up tullsta from apartment to apartment. It is in sorry shape. The cats were new and untrained when we bought it, and it was more of a scratching post than anything else. We bought a slip cover for it, but I hated the look of the drapey, droopy bottom flaps. Still, it hangs around. Why? Because it is awesome and I love how comfortable it is. I like to sit with my legs slung over the side.
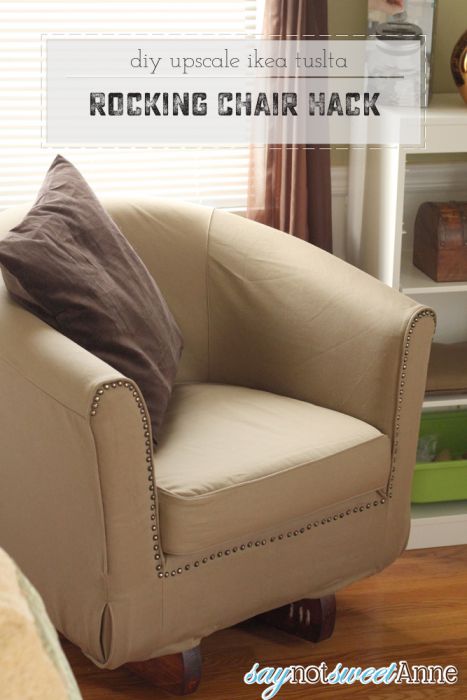
So hubby had a look and said “I can make that!”. One Ikea slipcover, some decorative tacks, staples, and some scrap wood later and we had a rocking chair. It is the most cozy and comfy reading chair I’ve even sat in, and I love it for Jamie’s room!
What We Used:
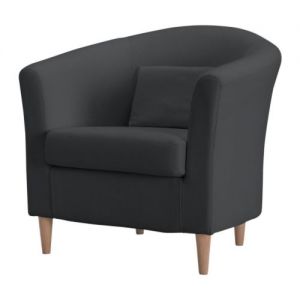
- Ikea Ektorp Tullsta, or something similar.
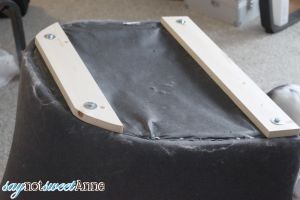
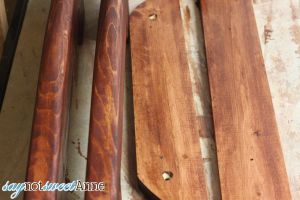
- Hubby cut out the rockers for our chair from 2×6 wood. He followed a guide to make sure both sides were equal, and then clamped them together to sand and smooth evenly. Then he stained and sealed them. You could also just buy rocker legs.
- Matching slip cover for the chair.
- Staple gun and staples.
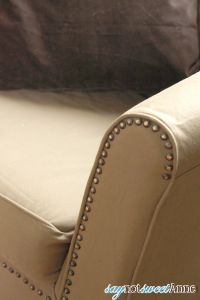
- Decorative tacks for upholstery.
- Spare pine wood or other scraps to re-enforce the chair bottom.
How We Made It:
- First hubby removed the legs from the chair. Then he cut support beams of wood to go across the frame where the rockers would anchor.

- He made the rockers, stained both the rockers and the frames, and then attached them to his frames. The whole thing went back on the chair.
- Then it was off to Ikea. We bought a slipcover for the chair, but rather than let the flaps hang as most slip covers do, we used our staple gun to tuck, pull, and staple the cover so that it works more like new upholstery. That was the single greatest improvement of the whole project!
- We grabbed some rustic upholstery tacks and went to town. This little detail really elevates the chair to something more special than just a slip covered rocker.
- Done! It really wasn’t hard at all. And the cost was less than $60, which is an excellent deal to save my favorite chair AND turn it into a rocker!
Kayla Domeyer
Latest posts by Kayla Domeyer (see all)
- Miniature Bohemian Style 1:12 Dollhouse Rattan Shelf - August 24, 2023
- How I made a DIY Prop Dragon Book (Twice!) - March 20, 2023
- How to Solve Stress with Princess Bathtub Melts - June 2, 2020