There have been hundreds of tutorials written about the Sharpie Mug method, some using plain Sharpies, others using the oil-based kind. Essentially, you write on a mug in Sharpie and then you bake it until the drawing becomes semi permanent. Sounds amazing huh!? Always excited for new ways of decorating my coffee mug, I’ve had that craft floating around in m head waiting for the right time. And truthfully, I’ve heard a few rumor that those types of mugs are not actually permanent. So, I’ve been leery about giving them as gifts.
I’ve done other Sharpie projects that add a little more artistry to the permanent-marker concept, like these DIY Domino Necklaces. A little bit of rubbing alcohol and a new world of possibilities is opened up.
 Then, I learned about dishwasher safe Mod Podge. Full stop. Seriously, I butted into an overheard conversation so ask “Wait- they make DISHWASHER SAFE MOD PODGE!?” and then I promptly ran to amazon and purchased some.
So, what do Sharpie markers, the alcohol technique I shared in the DIY Domino Necklaces and Dishwasher Safe Mod Podge have in common? This gorgeous mug that I made for my mom. I knew when I decided to give her the Sentiment KCups that I could really get her a mug to go with. After weeks of searching department stores, I sat down at my craft table with a blank white ceramic travel mug, my markers and some rubbing alcohol. And Look at how pretty it turned out!
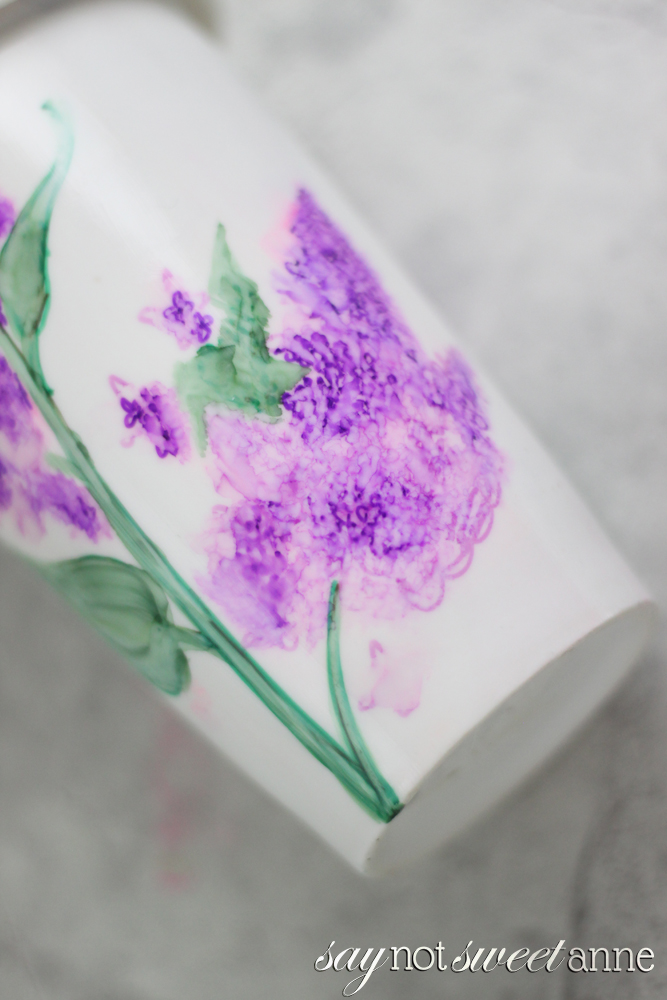
My mom has always been a fan of lilacs, so that was a no brainer. I started by making sure the mug was clean of oils by rubbing it down with rubbing alcohol. Then I set to work scribbling some lilac-ish shapes and then using the rubbing alcohol and a stippling paint brush (the kind you dab up and down instead of brush with) to make the impression of hundreds of tiny lilac flowers. The stems were drawn first in Sharpie marker and then lightly brushed over with a paint brush dipped in alcohol, which made them look painted on.
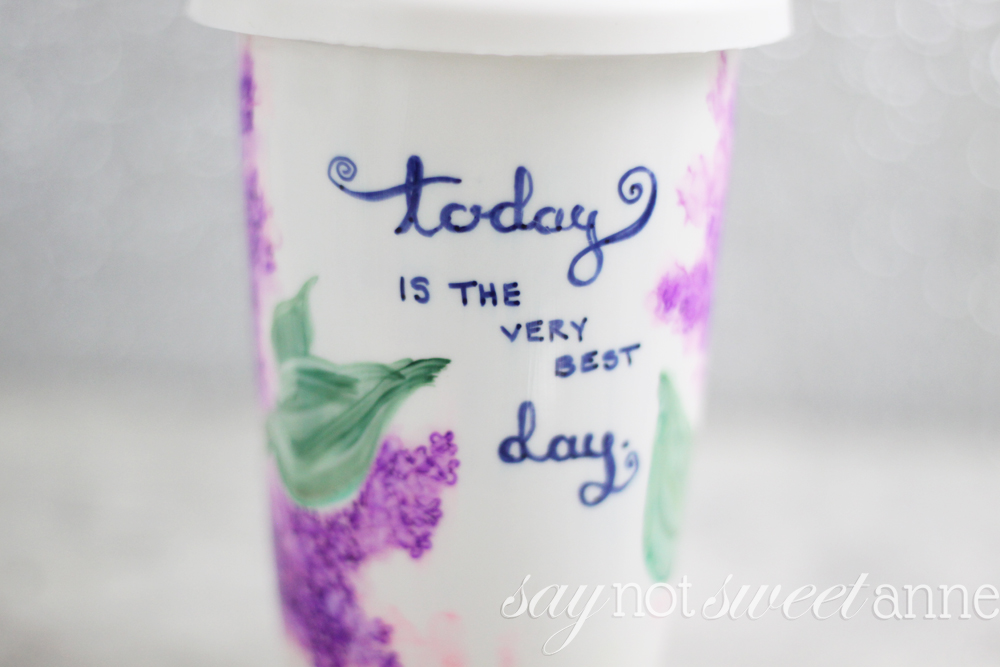
The best part of this method? If you mess up, rubbing alcohol will fix it. I tried 4 times before I got the hand lettering right. When I messed up, I just took a cotton swap dipped in the rubbing alcohol and erased my mistake before starting over. Once I had everything where I wanted it, I gave it 2 days to dry. It might be excessive, but I didn’t want to mess up my pretty creation! Then I gave it 1 thin, lightly applied coat of the Mod Podge, careful not to go over the same area too many times as it might smudge.
Then it was rinse and repeat. A total of 4 coats for this lovely creation. There is no baking involved! Just let the mug cure (Mod Podge recommends 28 days) and you are good to go on the top rack of the dishwasher. I’ve got a friend who used the Mod Podge with a glitter mug and its still going strong after 5 years of use!!
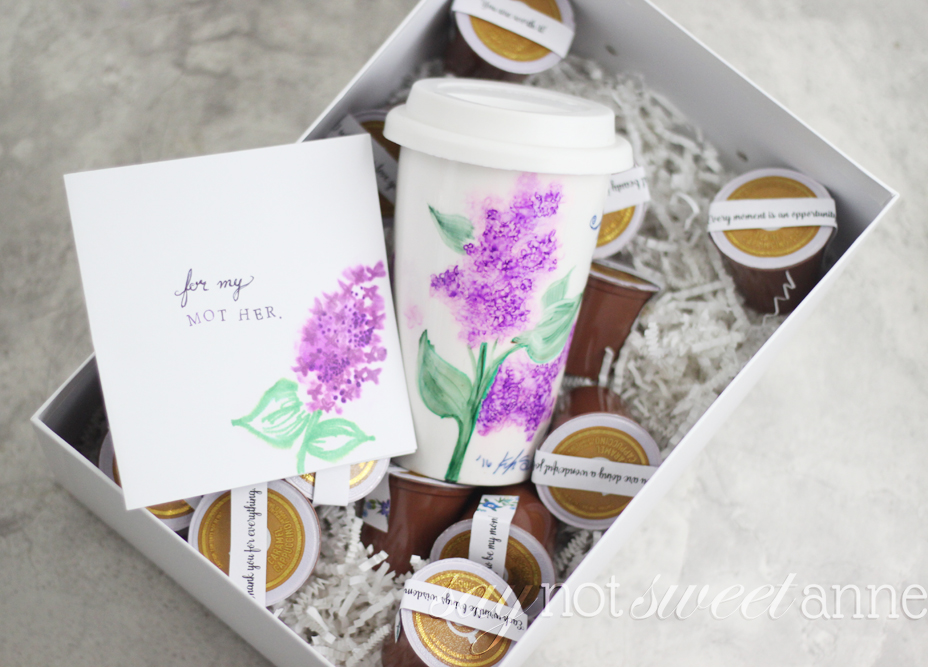
I paired the pretty mug with the K Cups and they are all ready for my mom! I hope she loved them. (I know I’ll be making a mug for myself this weekend. I can give myself Mother’s Day gifts… right?)
Kayla Domeyer
Latest posts by Kayla Domeyer (see all)
- Miniature Bohemian Style 1:12 Dollhouse Rattan Shelf - August 24, 2023
- How I made a DIY Prop Dragon Book (Twice!) - March 20, 2023
- How to Solve Stress with Princess Bathtub Melts - June 2, 2020
Hi there!
Did you leave the mug to dry for 28 days between coats of Mod Podge?! It seems excessive but I thought I’d confirm before trying it! =)
Thanks!
Great question Christina! No, I didn’t. Just 28 days before I gifted it 😀
I’m going to do this project with my 6th graders as a Christmas gift for their parents. Who doesn’t like beautiful art from their kids, right!
Jenn – that is so sweet! I would LOVE that gift!
Did you use regular Sharpies or the oil-based ones?
Hey Shannon, Just the regular ones. The Dishwasher safe mod podge is the key to keeping them on there!
Can I use normal mod podge? I am only going to be hand washing the cup and only use it for Santa’s milk
Regular Mod Podge will definitely come off when exposed to water. It is a water based glue, and will soften. That said – if it is just to use occassionally – I’d say just leave the Sharpie unsealed. It is alcohol based and doesn’t come off easily with water. It will fade over time though.
This is awesome, I have tried the sharpi and baking way but wasn’t happy with it. I have read to do with oil based and I finally bought some quite a while ago but haven’t tried it yet. I seen something about dishwasher safe mod podge so I kept reading about it and found this! I’m so excited to this now, I ordered some of the mod podge !! Thanks for sharing your experience!