Recently I’ve been obsessed with brightly colored accessories. I don’t actually have any, but I’ve been pinning them, adding them to wishlists, and day dreaming about having just the thing to complete every outfit. Granted, a lot of this is just the wishful thinking of an overworked designer and mom, since getting out the door at all is a victory and fashion is definitely not on the top of my to-do list.
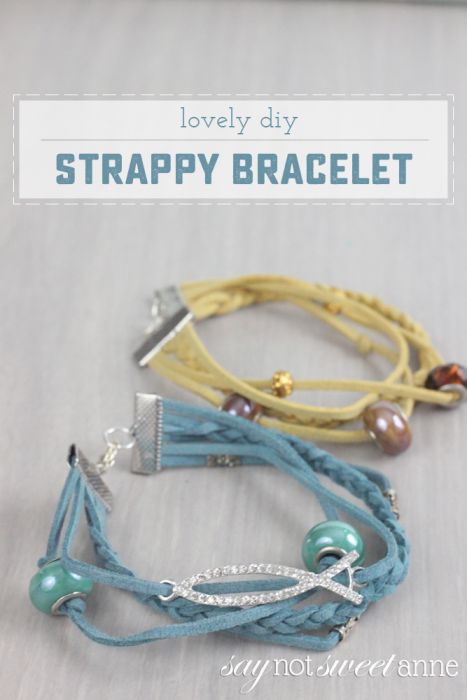
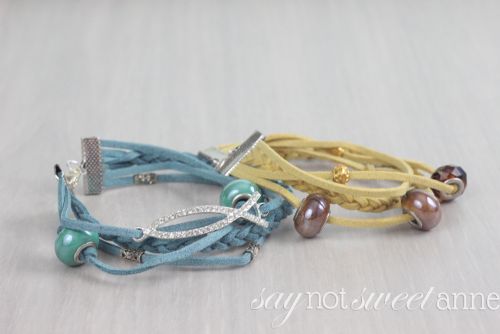
When fashion meets craft though? That is something I can get behind. The construction of the DIY Strappy Bracelet was so easy and interesting, I had no choice but to make a few. Picking out beads and charms was so fun! Assembly was easy and the result looks so expensive, easily as darling as the ones I’d wished for.
What You Need:
- Colored Leather Cording (I bought a variety pack like this and used all of each color).
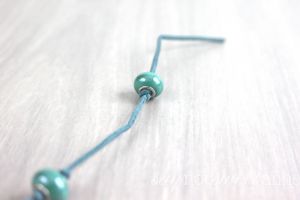
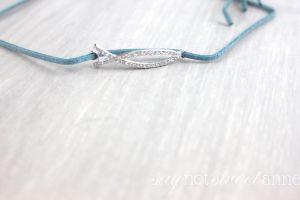
- Assorted beads and charms (be sure to pay attention to the opening of your beads, they will need to lace on to the cord after all)
- Ribbon Clamp findings (The look like this)
- Large jump rings and lobster clasp (I recommend buying a starter/combo kit as these can get pricey buying each alone)
- Small pliers
- Masking tape (optional, but helpful!)
- Some type of permanent glue (I used e-6000)
How To Make It:
- Start by measuring the length you’d like your finished bracelet to be, then add an inch for wiggle room. I did this by holding up a piece of the cording around my wrist and then using a ruler to measure it. Cut 2 or 3 pieces of cording at this length.
- Thread your beads and charms on to these pieces of cording, tying a knot on either side of the charms so that they can’t move. (Some of my charms were a tight enough fit that they weren’t moving anyway.)
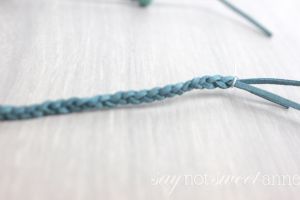
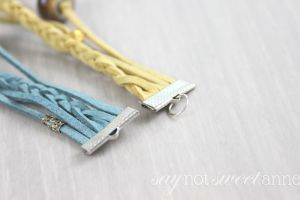
- For the braided section, add another 2 inches to the length of your other strings, and cut 3 pieces. Braiding will shorten the length for that bit. Make a tight braid and tape the ends so that it doesn’t unravel.
- Use the masking tape to hold all of the pieces together on one side while you sandwich them into the clamp.
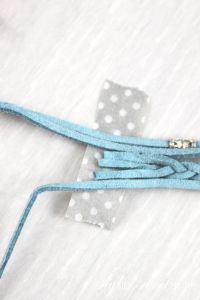
- Add a dab of glue on each string, and then clamp the finding shut. This should hold all of the leather cords and allow you to claps them.
- Repeat on the other side, being sure to trim off any excess so that the total length is about 1/2 inch short of what you want your finished bracelet to be (the clasp will add about 1/2 inch in length).
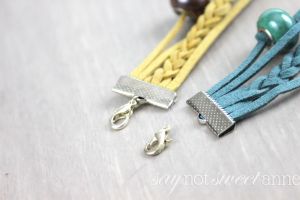
- Add a large jump ring to one end of the bracelet by opening the ring with your pliers, threading it onto the clamp, and then closing in the same way. This will be what our clasp latches on to.
- Attach your lobster clasp by opening a smaller jump ring, threading the clasp and clamp and then closing.
- Done! This is a great beginner jewelry project because the ring and clasp mechanisms are simple and easy to re-do if you’ve made a mistake. Plus, the result is stunning!
The following two tabs change content below.

Kayla Domeyer
My name is Kayla and I am an Artist and Graphic Designer. That means that I love pretty things, and also that I like to make free printables! I'm so happy that you've stopped by to visit my blog, and I hope you find something interesting here. In the past 15 years since I started the site, I bought a house, had two children, and shifted careers. My focus now is more about sharing and less about the daily grind.
Latest posts by Kayla Domeyer (see all)
- Miniature Bohemian Style 1:12 Dollhouse Rattan Shelf - August 24, 2023
- How I made a DIY Prop Dragon Book (Twice!) - March 20, 2023
- How to Solve Stress with Princess Bathtub Melts - June 2, 2020