
Last week, I had the AMAZING pleasure to guest post on SkipToMyLou. Cindy and her helper Laura are two amazing women. They are always a joy to work with. Today, I’m sharing that post with you all!
There are some things you never outgrow. For some it’s tearing the crust off their bread or eating all of the red M & Ms first. Me, I don’t like my food to touch. I know, I know, I’m an adult and a little green bean juice never ruined a pile of mashed potatoes. But the fact is, I just plain don’t like it. I even have a couple of those segmented cafeteria plates that I pull out when I’m feeling kidish. So, my husband wasn’t particularly surprised when I set out looking for a yogurt & granola cup. I’ve recently been making a lot of pumpkin pie granola, and am sort of addicted to it. I wanted something that was compact, re-usable, and allowed me to store yogurt separate from granola in my lunch.
What did surprise him, and me, is that I found nothing. I scoured online stores and Google, but I found no good solution. Bummed, I started thinking of how I might make my own makeshift replacement. It was a stroke of inspiration that lead me to my latest favorite craft. The DIY Lunchable Jar.

Now, I started this for yogurt and granola- but with this gadget the possibilities are endless! Earlier this week I took soup and crackers. I put the soup part in the microwave (its just glass after all) and the wide mouth was more than comfortable to eat out of. So far I’ve tried cereal and milk, Dip and veggies, caramel and fruit, even cheese, crackers, and tuna salad.
I just can’t get over how cute, useful and portable these are! And all for the price of 2 mason jars. I’ve already made 3 sets and I’ve got PLENTY of ideas for more. Imagine the Christmas gift applications!! Below, you’ll even find a free printable with a sample of all the kitschy but cute “perfect pair” saying’s I’ve cooked up. (That includes a “gruesome Twosome” printable for Halloween!)
Anyway, enough ranting about the jars, here’s how its done!
You Will Need:
- 2 same mouthed mason jars. I used 2 low profile wide mouth 8 oz jars. These are perfect for me because 8 oz is a serving size of most things. However, once you’ve made the connector rings, you can swap out ANY jar of the same mouth size! I think an 8 oz tall one and a short 4oz would be great too! Its up to you of course- the possibilities are many!
- Lead Free Solder. I got mine at Radio Shack. (Way cheaper than the craft stores!)
- Soldering iron. (hubby had one, but you can pick them up pretty cheap)
- Sand Paper (Just a little)


How To Make It:
- Take off the rings to your jars. Sand them on top to remove any coatings that might prevent the solder sticking.

- Using your soldering iron place “blobs” of solder at even intervals near the interior hole of the rings. Solder is pretty easy to work with, just stick it on the iron until it melts!
Time Stamp 2:55 on the video below shows how to solder, for those who need a little more instruction before diving in. =D

- Place the two rings together. Use your soldering iron to heat up those blobs while holding the rings steady. They will melt then re-solidify forming a dishwasher safe, permanent bond!

- Once the interior hole has been secured, melt blobs of solder at even intervals on the outside.

- That’s it!! Start hooking up amazing lunch combinations!


One of my favorite things about this project is the lack of garbage in my lunch box. My heart sinks when I throw away 4 ziplock bags each day. With these jars and my left over coffee bottles I have a plastic free meal!

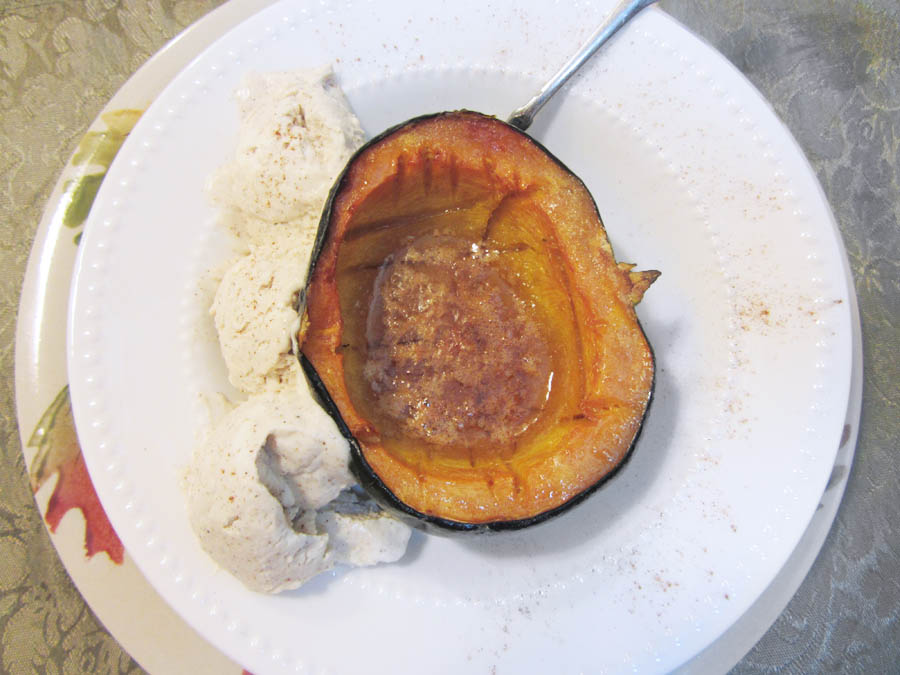
The 8oz wide mouthed jars are very bowl-like. I was perfectly comfortable eating hot soup out of it. And there’s the yogurt and pumpkin pie granola that started it all.

And, as promised a PDF for you to download and print to use with your schmancy new jars. They don’t have to be for food either, “One for the money, Two for the show” would be SO CUTE with cash in one jar and a cinema gift card in another. What a unique wedding gift!!
Thanks SO MUCH to Skip To My Lou for hosting my guest post. I can’t wait until next time!

Kayla Domeyer
Latest posts by Kayla Domeyer (see all)
- Miniature Bohemian Style 1:12 Dollhouse Rattan Shelf - August 24, 2023
- How to Solve Stress with Princess Bathtub Melts - June 2, 2020
- 25 Valentines Even a Toddler Can Make - February 11, 2020
I’m always looking for things to do with my canning jars. This is another great idea!
I think I would try this with glue and the plastic lids made for canning jars; plumbers’ goo should work. Save the metal for if I ever learn to can food. 🙂
You can also you dabs of fish tank glue. (found at you better aquarium stores) — In the catering biz this is the way we did so many things and it is very food safe.
Again yet another cost effective (cheap) quick and easy gift idea. People with think I am so on my game. Thank You.
they’re cute but my question is how to do open it without the contents spilling?
Jada,
It looks like you couldn’t doesn’t it? But there are still 2 lids there. So, you flip it so one side is on your table and unscrew the bottom lid. Then, flip the other one down and take off the remaining part of the coupler. Easy!
Sorry, but this seems like a really stupid idea. Why not just take two jars?
Hey TR!
I totally get it if you wouldn’t want to make the jars yourself. I’m not sure that makes it a “really stupid idea”, though. Firstly, two jars will clink together in a lunch sack. Secondly, its two things to grab instead of just one. Finally, there is definitely a novelty, or “cute” factor to this project that makes it interesting, especially for a gift set.
Also, Sometimes, I want things all in one. Why bring a thermos that comes with a cup instead of a cup and a thermos? Why bring a compartmentalized tupperware instead of just several small tupperwares? I think it all comes down to personal preference.
I get a lot of positive comments on mine in the lunch room. So, at least some people like it!!
love this! what a great way to keep your lunch waste-free! plus, any uneaten food is ready for the fridge at home!
Come visit us at http://www.thesitsgirls.com!
Such a great idea!! I LOVE, LOVE, LOVE this!! THANK YOU for sharing this!!
Genius! I love it! I am featuring this tomorrow at my link party over at The Winthrop Chronicles!
Sarah recently posted..{giveaway} ibond + felt flower pins
Fantastic idea! Can’t wait to see all the “fillings” you create! Thanks so much for linking on Busy Monday!
Charlene@A Pinch of Joy recently posted..Snickers Surprise Salad
These are just too clever. I have just got to go “borrow” my hubby’s soldering tool to try these. I am pinning them!
I would also love to invite you to share these or any of your other favorite posts at Freedom Fridays Blog Hop. (no rules and live now) So hoping to see you there.
Evelyn @ My Turn (for us) recently posted..Freedom Fridays #26
Just stopping by to invite you to My Wednesday Linky party. http://diycraftyprojects.com/2012/10/whatcha-work-up-wednesday-linky-party-6.html
Such a great idea. The wheels are turning. I’m sure there are a hundred uses for this. Thanks for the tutorial.
What a fantastic idea! I hate all those plastic bags as well. We have some fabric bags that use velcro and are washable. Love those, but I know my kids would love this idea. The idea of soldering intimidates me a bit though, is it hard to learn how to do? Do you think using a glue like E6000 would work as well and work in the dishwasher? Thanks so much, I’m pinning this so I can make them at some point!
K Coake recently posted..Bathroom Towel Rack {DIY}
You could definitely try E6000, but I wanted to make sure that it was permanent. I have an irrational fear of picking up on end of it and glue coming off and the other one crashes to the floor in a spray of broken glass.
Soldering really is NOT hard. I posted a video in the tutorial that shows you the basics (its a long video, the soldering part is at 2:55) Really you just use a hot tool to melt the solder (metal) and when it solidifies its permanent! I will say though, you HAVE TO SAND it. Otherwise, the coating on the lids will keep it from sticking. =D
If you do try it with glue- pop back to show us how it worked!!
I love this! Such a great idea!
Kathy recently posted..Jack O’ Lantern Themed Dinner
Okay, another clever idea! I’m a follower now!
Amy recently posted..DIY: Chalkboard Camoflauge