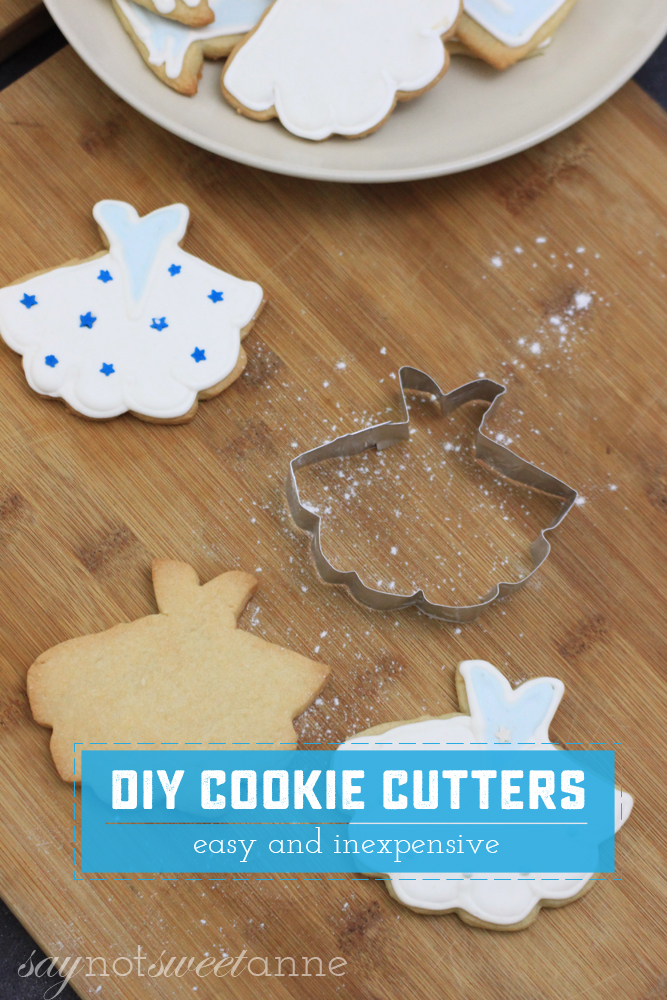
 What happens when you can’t find just the right cookie cutter? You Google “How to make a cookie cutter”. And if you’re like me – you are delivered to tens of search results that are too difficult, too expensive, or require too much time for glue to dry. That is what happened to me in 2012 when I was searching of – ahem – bachelorette themed cookie cutters for my good friend’s wedding. So what did I do? I combined the wisdom from a lot of those posts and experimented until I came up with my own glue – free method.
Don’t get me wrong! There are some great tips and tricks to be learned from other cookie cutter tutorials! Check out Instructables or Sweet Sugarbelle if you need more inspiration.
Since that year I’ve used this tutorial on how to make a cookie cutter several times. It is a fan favorite in my house because the sky’s the limit! We can make everything from super heroes to band logos. If you’re interested in DIY cookie cutters you’ve come to the right place. This method uses an aluminum roasting pan rather than smaller items like aluminum cans, so that I can make more complicated shapes. It is also dishwasher safe because there is no glue to dissolve or melt!
What You Need:
- Heavy disposable aluminum roasting pan
- Heavy duty scissors
- Paper and pen
How To Make a Cookie Cutter:
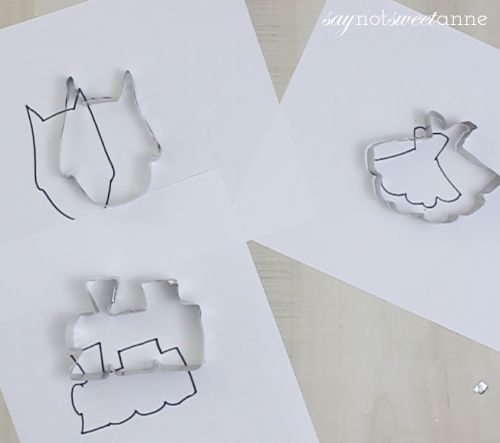
- Begin by drawing the shape of your cookie cutter on paper in the size you want to achieve.
- Using your scissors, cut the bottom out of the roasting pan. If the pan you’re using has ridges, use a roller to flatten it.
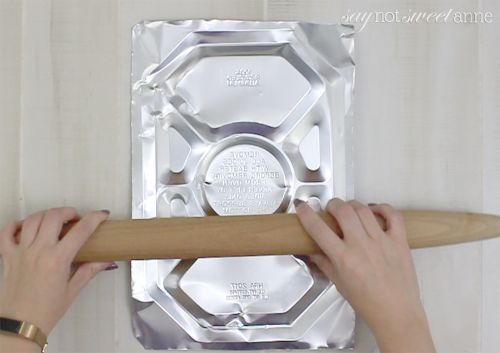
- Cut 1″ strips out of the bottom of the pan. Try and keep these straight, as the cutting edge of your cutter will need to be. Flatten these as well.
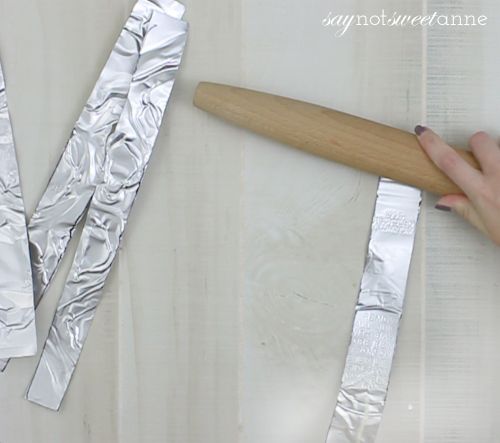
- Fold the strip the long way about 1/3 of the way down. This creates a nice smooth edge to protect you from being cut while using the cutter.
- Now, begin to make the cookie cutter but moving and bending the strip along the design that you drew. Use pliers, fingers, whatever works for you to get all the right bends in all the right places. If your strip isn’t long enough, skip to step 6 and use the tab-and-slot method to join another strip to yours. Then continue to shape!
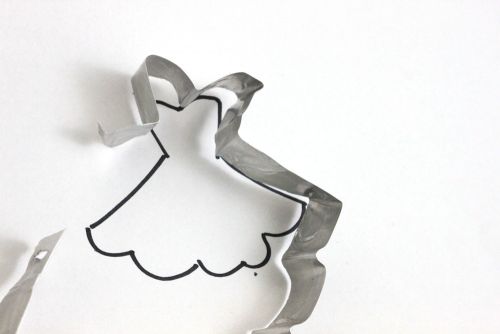
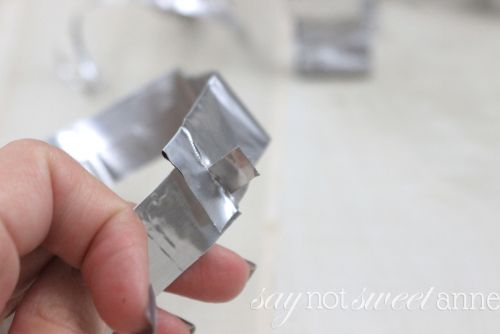
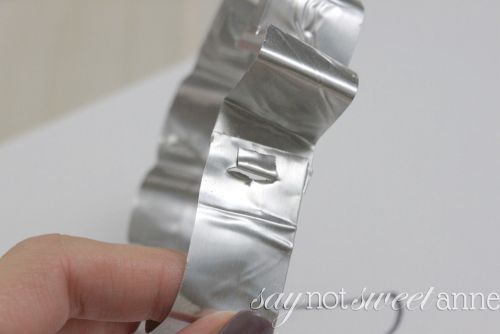
- At the end of your cutter, overlap about 1″. Using your scissors, cut a tab into one end, and a slit into the other. Push the tab into the slit and bend the tab back on itself. This way your cutter stays together (even through the dishwasher!) with no glue.
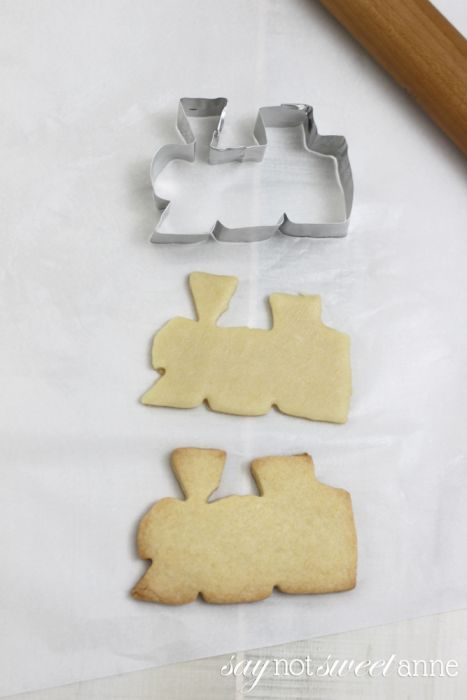
- Use your cutter and bake some cookies!
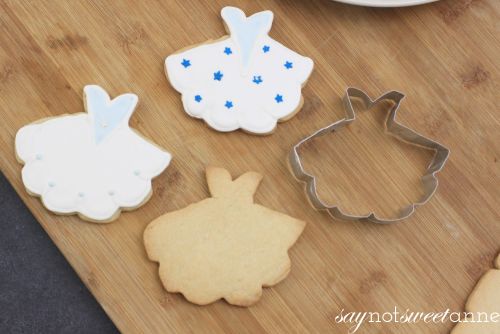
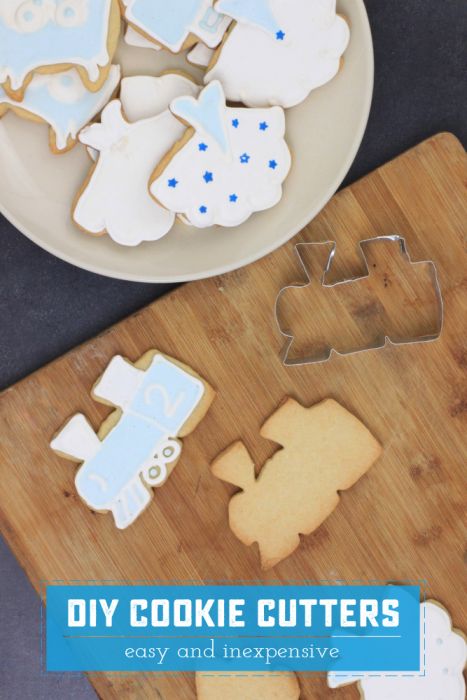
Kayla Domeyer
Latest posts by Kayla Domeyer (see all)
- Miniature Bohemian Style 1:12 Dollhouse Rattan Shelf - August 24, 2023
- How I made a DIY Prop Dragon Book (Twice!) - March 20, 2023
- How to Solve Stress with Princess Bathtub Melts - June 2, 2020

Fantastic! !
Hi, Is there a specific weight I need to get? I tried this with a pan I got at the dollar store and it wouldn’t hold the shape for anything!!!
Thanks
Hey Teri!
Like the post mentions, a heavy duty pan works the best. I would guess that the one from the dollar store wasn’t heavy enough. There is usually a type that says “heavy duty”.
you have just saved me!
I am attempting to carve biscuits for hubbys birthday on the weekend and having a terrible time today. on my second batch of dough and knew I needed to make a cutter of the shape
I love you for this x
Grazie mille per il tuo tutorial!! Chiarissimo 😀
Fantastico!
Ginestra recently posted..Effetto legno su pasta di zucchero – tutorial
Wonderful tutorial thanks for sharing.
What an awesome idea, thanks so much for sharing! I found this through Pinterest and I will be using it for sure! 🙂
Genius!! Luv this idea.
Love how handy & easy this is. You’ve been chosen as the Blog of The Week! Stop by & grab a Featured On button. Thanks for linking to Sew Can Do’s Craftastic Monday party:)
Cheryl@ Sew Can Do recently posted..New Ideas To Ponder and The Craftastic Monday Link Party
Thank you so much for linking this up into our Crafty Showcase. We are featuring you today on our blog. Stop back in on Saturday and share more of your awesome ideas in our Crafty Showcase.
have a super weekend!
Susie @Bowdabra
http://bowdabrablog.com/2012/09/14/feature-friday-bowdabra-top-crafty-showcase-picks-14/#
Susie @Bowdabra recently posted..Feature Friday: Bowdabra Top Crafty Showcase Picks
How cool is it that you were featured on C.R.A.F.T.?? Way to go, Kayla!
I KNOW!!! I’m so flattered!!
Awesome idea…couldn’t you use the tab/slot technique to put more than one strip together if one isn’t long enough?
You know, you probably could! I hadn’t thought of that!
This is an awesome idea! I’d love for you to pop over and share it in Mommy Solutions!
Crystal
http://www.crystalandcomp.com/2012/09/the-mommy-club-share-your-resources-and-solutions-60/
I love this idea! I am totally going to use your tutorial to make mini cookie cutters for crackers. Thanks for sharing.
Jennifer @ Healthy Kitchen Guide recently posted..Soaked Tortillas Recipe – Whole Wheat
That is such a great idea! I have been want a cookie cutter in the shape of a leaf and I can’t find one. Thanks for the tutorial.
rose recently posted..Tip: Glad Pres’n Seal, easy mess clean up, or cover a grimy a restaurant table
I love this how great!I have been wanting to make some for my kids pbj do you think it would be sturdy enough for that?
kelley @ Miss Information recently posted..The secret to no Tears When Chopping Onions
I think they’d definitely be sturdy enough. My only concern would be to find a biog enough roasting pan so your strips are long enough for a bread sized cutter.