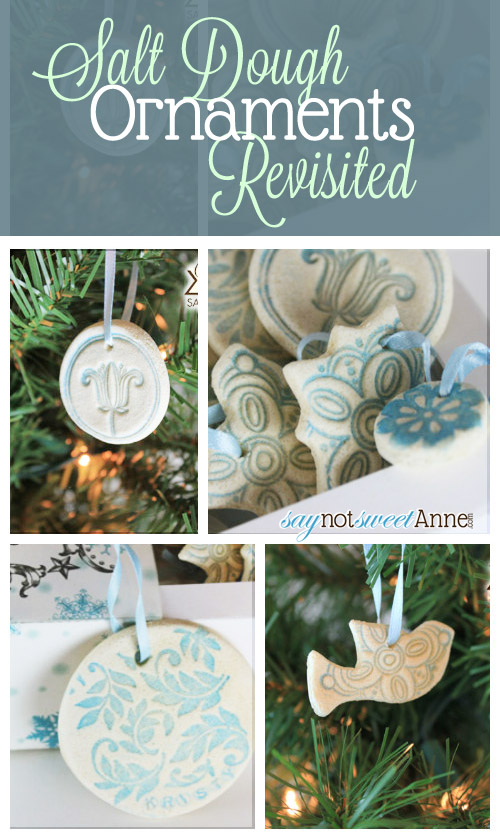
Alright alright. Salt dough ornaments are not new. Salt dough is a tried and true kid friendly craft that has been reincarnated into hundreds of different projects. And really- it is a dough. Why not roll and cut it out with cookie cutters? Its really not a stretch. So, when I decided I needed to make some mini ornaments for my mini tree, I thought and thought about how to make them unique, and original; not just another salt dough ornament.
This is what I came up with. By using acrylic paint to whiten the dough, and stamps to emboss them, these little beauties really look like ceramic- what a lovely touch! And honestly, its a lot easier than painting them!
What You Need:
- 1/2 cup table salt
- 1/3 cup water + more for texture
- 1-2 tsp vegetable or canola oil
- 1 cup flour
- Paint (optional)
- Stamps and Ink
- Oven or Toaster Oven
How to Make It:
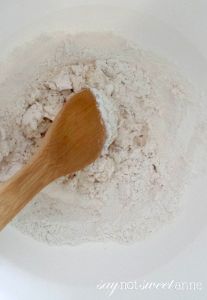
- Boil the water and add the salt to it. Mix until the at least some of the salt is dissolved.
- Combine salt water with flour and 1 tsp of oil. Mix thoroughly. If mixture is too dry, add additional water in 1 tbs increments until a soft dough forms.
- Coat the dough in oil and cover in plastic. Let stand at least an hour. (You can skip this step but I find it makes a better texture.
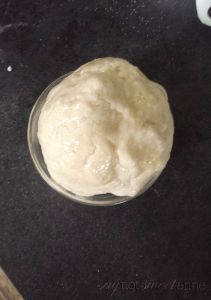
- Knead your dough until it is soft and pliable. If you want to make the dough a little more porcelain in color, add a bit of white acrylic paint (regular craft paint is fine. I use Americana because its good and cheap!) and knead it into the dough. Add some more flour if the dough gets too sticky.
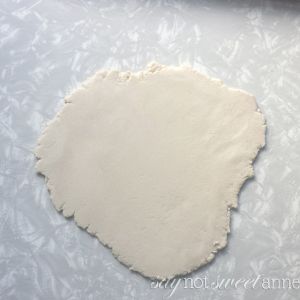
- Roll the dough out to your desired thickness.
- Select some of your favorite stamps. I don’t remember where I got these stamps(My collection just keeps growing!), but here are a couple similar stamps. Floral Stamps, Floral Stamps 2 and Damask Stamps. I chose to use blue and red inks. Use the stamps to place a colored imprint in the dough. Cover enough of the surface so that you can cut shapes out of the dough. Experiment with adding initials and dates in the dough as well.

- Use your favorite cookie cutters to cut out shapes. I’ve collected several over the years but these mini Wilton cutters would be a great start! Remember to poke a hole in them for ribbon later on.

- Bake the shapes at 200 degrees overnight- until all moisture is gone. (This is important, baking at a higher temperature will make them puff up and lose some of their shape.)

- Lightly sand the edges to remove any uneven bits.

- Thread a ribbon through the holes and hang!


The following two tabs change content below.

Kayla Domeyer
My name is Kayla and I am an Artist and Graphic Designer. That means that I love pretty things, and also that I like to make free printables! I'm so happy that you've stopped by to visit my blog, and I hope you find something interesting here. In the past 15 years since I started the site, I bought a house, had two children, and shifted careers. My focus now is more about sharing and less about the daily grind.
Latest posts by Kayla Domeyer (see all)
- Miniature Bohemian Style 1:12 Dollhouse Rattan Shelf - August 24, 2023
- How I made a DIY Prop Dragon Book (Twice!) - March 20, 2023
- How to Solve Stress with Princess Bathtub Melts - June 2, 2020
do you use acrylic paint on top as well on the detail work/stamped portions, or do you use a particular stamp ink?
Hey Becca! I just stamp with a normal ink pad- wiping the stamp as I go so not to get dough on the pad. I only use the white paint in the dough. Nothing after I’ve cut and stamped. I hope that helps!
Do you need to coat with mod podge or some other sealant after baking?
Hello Mel!
You do not need to do anything more with the ornaments after baking. They are beautiful as is!
Can you make the dough the night before?
Hey Alexa! YES. Salt dough will keep for a couple of days wrapped tightly. You might have to add more water when you’re ready to work with it, to make it more pliable.
How many hours is “over night”?
Hello Evette! Usually 8 hours or so. Hope that helps!
Hi,
Do you think the salt dough would be strong enough to make necklace pieces?
Thanks!
Happy Holidays
Hey Dana!
I know some people have used them to make beads etc. I think if you used a glue-on bail (Like in my baby art pendant or Domino necklace) then they would be OK. I wouldn’t trust them to be punched and threaded on their own. I hope hat helps!!
is there another way of not leaving them in the oven over night
Sure, you can leave them out on a rack, but I’ve found the paint color pools on the bottom. So you should probably flip them every few hours.
Would a food dehydrator work instead of the oven?
I’ve never tried it. But I can’t see why not! Make sure that they don’t dry too fast, as the outside might shrink/crack before the inside is finished hardening. I’m sure with a little experimentation you’ll have no problem!
Could I please have your salt dough recipe that you used in the ornaments. I made one and it puffed up on me…..not flat after baked.
Thank you,
Diane
Sure thing! My go to recipe is equal parts salt (pulsed in the food processor so its finer) and flour, with just enough water to make a dough. For these, I added a squirt of white paint to make the dough a little more white in color.
However, I’ve had them puff up on me before when I baked them. Its important to have them in an oven at really low temp, preferably with convection on. If 200° is too high for you, try lower. My crafting toaster oven goes as low as 150°. We’re not trying to bake them, (which creates steam inside and causes puffiness) but only to gently help them dry out.
You could also skip the oven and just leave them out for a few days on the counter, flipping occasionally so the color doesn’t settle. Hope that helps!!
I just wanted to say I am so glad to have found your website. I was looking for an inexpensive Christmas craft to do with my daughter, who will be 11. These salt dough ornaments are much more elegant than the ones we would have done when she was younger. These are truly beautiful. Thanks for the great idea!
I am so glad that you like them! My little sister will be 12 in February- I know the troubles of doing something that is easy, but still appeals to her sense of style and interest. I would LOVE to see what you create!
These are so pretty! Have you tried it with different paint colors?
Yes I have! As long as you bake them dry (I did 200degrees over night) The colors come out really well. I prefer them to food coloring because they get very vibrant. However, if you air dry the dough, the color seems to “settle” to the underside of the shape, and the top gets very light in color. Strange!
Those are adorable. What a great idea. I love your blog. I’m your newest follower.
Would love to see you DIY Home Sweet home.
Jamie
http://diyhshp.blogspot.com/
P.S. I have a linky every Monday. Would love for you to stop by and link up.
P.S.S. I have giveaway going on right now. Would love you to stop by and check it out.
Those are beautiful! By far the most elegant salt dough ornaments I’ve ever seen!
These are the nicest salt-dough ornaments I’ve seen yet!! They’re simply beautiful!!
I’d love for you to link up this post and any other Christmas-related projects to my 26-Day Christmas Craft Linky Party!! You can link up here: http://lisascraftblog.blogspot.com/2011/11/christmas-craft-marathon-linky-party.html
Thanks so much for sharing!!
~Lisa