Its no secret that my best friend is getting married. I’ve posted a couple of crafts to that effect, and gossiped about her bridal shower. Well here’s another! You see, our workplace decided to throw Amy a shower (in addition to the 2 she had for her family) and I was brough on to lead it. Overall it was SUPER fun coordinating pink and grey colors to decorate our rather drab lunchroom. In addition to coordinating the event, I was signed up to bring the cookies and cake. (Amy doesn’t much like cake, so I wanted the cookies just for her.) And you know I couldn’t just buy something! Oh no, I went waaaay over the top with ideas of custom cookies/cake with Amy’s wedding “symbol” on them.
For the most part- it worked. =D I used a few super secret recipes (from some AWESOME bakers out there!) and Wilton ColorMist food spray.
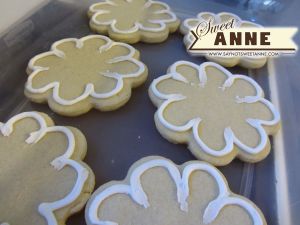
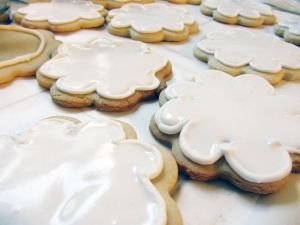
This was my first ever shot at a royal frosting cookie. It was also the first time I’d ever used the “flood icing” technique. So, I’m going to take you through my adventure.
First, I baked the cookies. My mother has a secret family recipe but those tend to rise a lot, and they are very cakey in texture. So, I hopped on one of my favorite cookie maker’s websites [That’s you NotYourMommasCookie.com! ] which directed me to Bake at 350 for their Vanilla Almond sugar cookie recipe.
Vanilla Almond Sugar Cookies
Ingredients:
3 c unbleached, all-purpose flour
2 tsp baking powder
1 c sugar (I use sugar that I’ve stored vanilla beans in)
2 sticks (salted) butter, cold & cut into chunks
1 egg
3/4 tsp pure vanilla extract
1/2 tsp pure almond extractInstructions:
- Preheat oven to 350.
- Combine the flour and baking powder, set aside. Cream the sugar and butter. Add the egg and extracts and mix. Gradually add the flour mixture and beat just until combined, scraping down the bowl, especially the bottom.
- The dough will be crumbly, so knead it together with your hands as you scoop it out of the bowl for rolling.
- Roll onto a floured surface and cut into shapes. Place on parchment lined baking sheets and bake for 10-12 minutes. Let sit a few minutes on the sheet, then transfer to a cooling rack.
So, After I baked all of the cookies (mine took exactly 12 minutes) I decided that was enough for the day. I loosely covered the cookies on the counter and came back to them after work the next day.
I started in on the frosting. Since I had such a great experience with Bake at 350’s cookies, I followed her icing recipe HERE.
I wasn’t exactly sure where to start with the whole icing/flood icing things so I took some pointers from another favorite of mine, Sweet Sugar Belle to gain some perspective. (I highly recommend you read what she has to say!)
Alrighty, all prepared I dived right in!
My personal experience tip for this one? Make more frosting than you think you need. I had to make additional frosting TWICE. That flooding really eats up the frosting! Thankfully mine was white so I didn’t have to match colors.
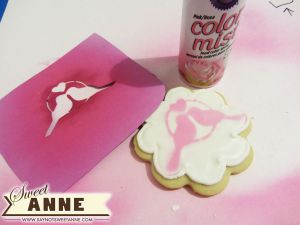
After the flooding I let the icing dry for about 2.5 hours. During that time I made my stencil (from my Silhouette) out of cardstock and created a safe place to use the spray food coloring (I didn’t want to stain my walls!)
After going through Sugar Belle’s tips on how to use spray color, I went at it with my stencil!
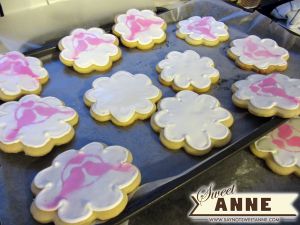
It took a couple tries to get the hang of it, but all in all they turned out awesome! I was so excited, I made a larger stencil and put it on the cake!
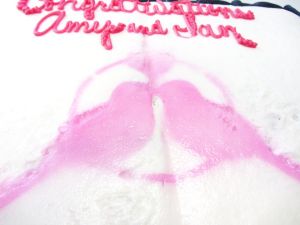
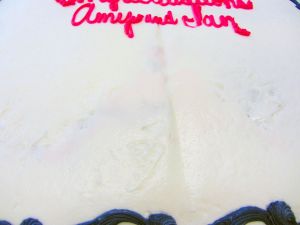
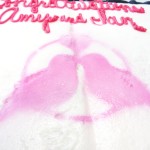
The next morning I packed them all into air tight cases and brought them to work. The cake sat for about an hour in my car before I brought it in. When I wet out there to get it, this is what I found.
I have no idea what happened. The frosting was buttercream, maybe it absorbed it? Although it was fine after sitting overnight. Maybe the sun in my car faded it? Maybe the heat faded it? Anyway, I thought it was very important to show you all this- so it doesn’t happen to you! The cookies were fine in the car, but the design on the cake just faded away like invisible ink.
I ran home on lunch and got the spray and the stencil and re-did it at work. It stayed for the shower. =D I would still recommend The Wilton ColorMist Spray as it worked out *so well* on the cookies. I expect this incident was a fluke, but be prepared!
So, that’s my crazy story about baking cookies and using color spray. All in all, I was really jazzed about the cookies. I got a lot of GREAT comments about the texture of the cookies and the frosting. I personally didn’t love the meringue powder flavor, but I’ve heard tell that different brands might taste better. (I used the Wilton) I’ll try something else next time.
Now my mind is just a-buzzin’ with all of the different cookies I can make! Fourth of July! Birthdays! Halloween! Thanksgiving! And that fabled Christmas! Really, the process was so easy, that with a couple different stencils I’m sure I could make up some grand results. Let me know if you try it!Kayla Domeyer
Latest posts by Kayla Domeyer (see all)
- Miniature Bohemian Style 1:12 Dollhouse Rattan Shelf - August 24, 2023
- How to Solve Stress with Princess Bathtub Melts - June 2, 2020
- 25 Valentines Even a Toddler Can Make - February 11, 2020










The cookies turned out so cute! I have never tried flooding or spray painting cookies but now I want to! Thanks so much for sharing at Mom On Timeout!
Trish – Mom On Timeout recently posted..Summer Reading Adventure: Week 3 – Skippyjon Jones
Kayla, your cookies turned out so beautifully!
Jenn/Rook No. 17 recently posted..GIVEAWAY ~ Win a Copy of Mod Podge Rocks! PLUS a Loaded Mod Podge Goodie Bag
Lucky Amy to have such a thoughtful friend! The lovebirds are fabulous! I’ve always wondered how the food color spray would work — sounds like a winner, even if it did fade on the cake. Thanks so much for sharing on Busy Monday at A Pinch of Joy. Hope to see you again soon!
Charlene@APinchofJoy recently posted..New cushions in five easy steps