So, planners are kind of my thing. Over the years I’ve made several (check out this pretty one from 2017!) but lately, I haven’t had the time. That’s not so bad though, because the market has erupted over the past few years, and there are plenty of adorable and affordable planners to purchase. I’m personally a huge fan of the discbound system. It has been around for decades, with huge brands like Levinger and ARC by Staples. Most recently the tell-tale discs have become the backbone of Planner 365 and some lovely notebooks as well.
The joy for the disc binding system is that pages can pop out and pop in again like a 3 ring binder, but with the lay-flat and 180 degree folding of a spiral notebook. Add in that you can bind several sizes of paper together in one notebook (like these adorable pop-in to-do lists) and it is a paper planner lover’s dream!
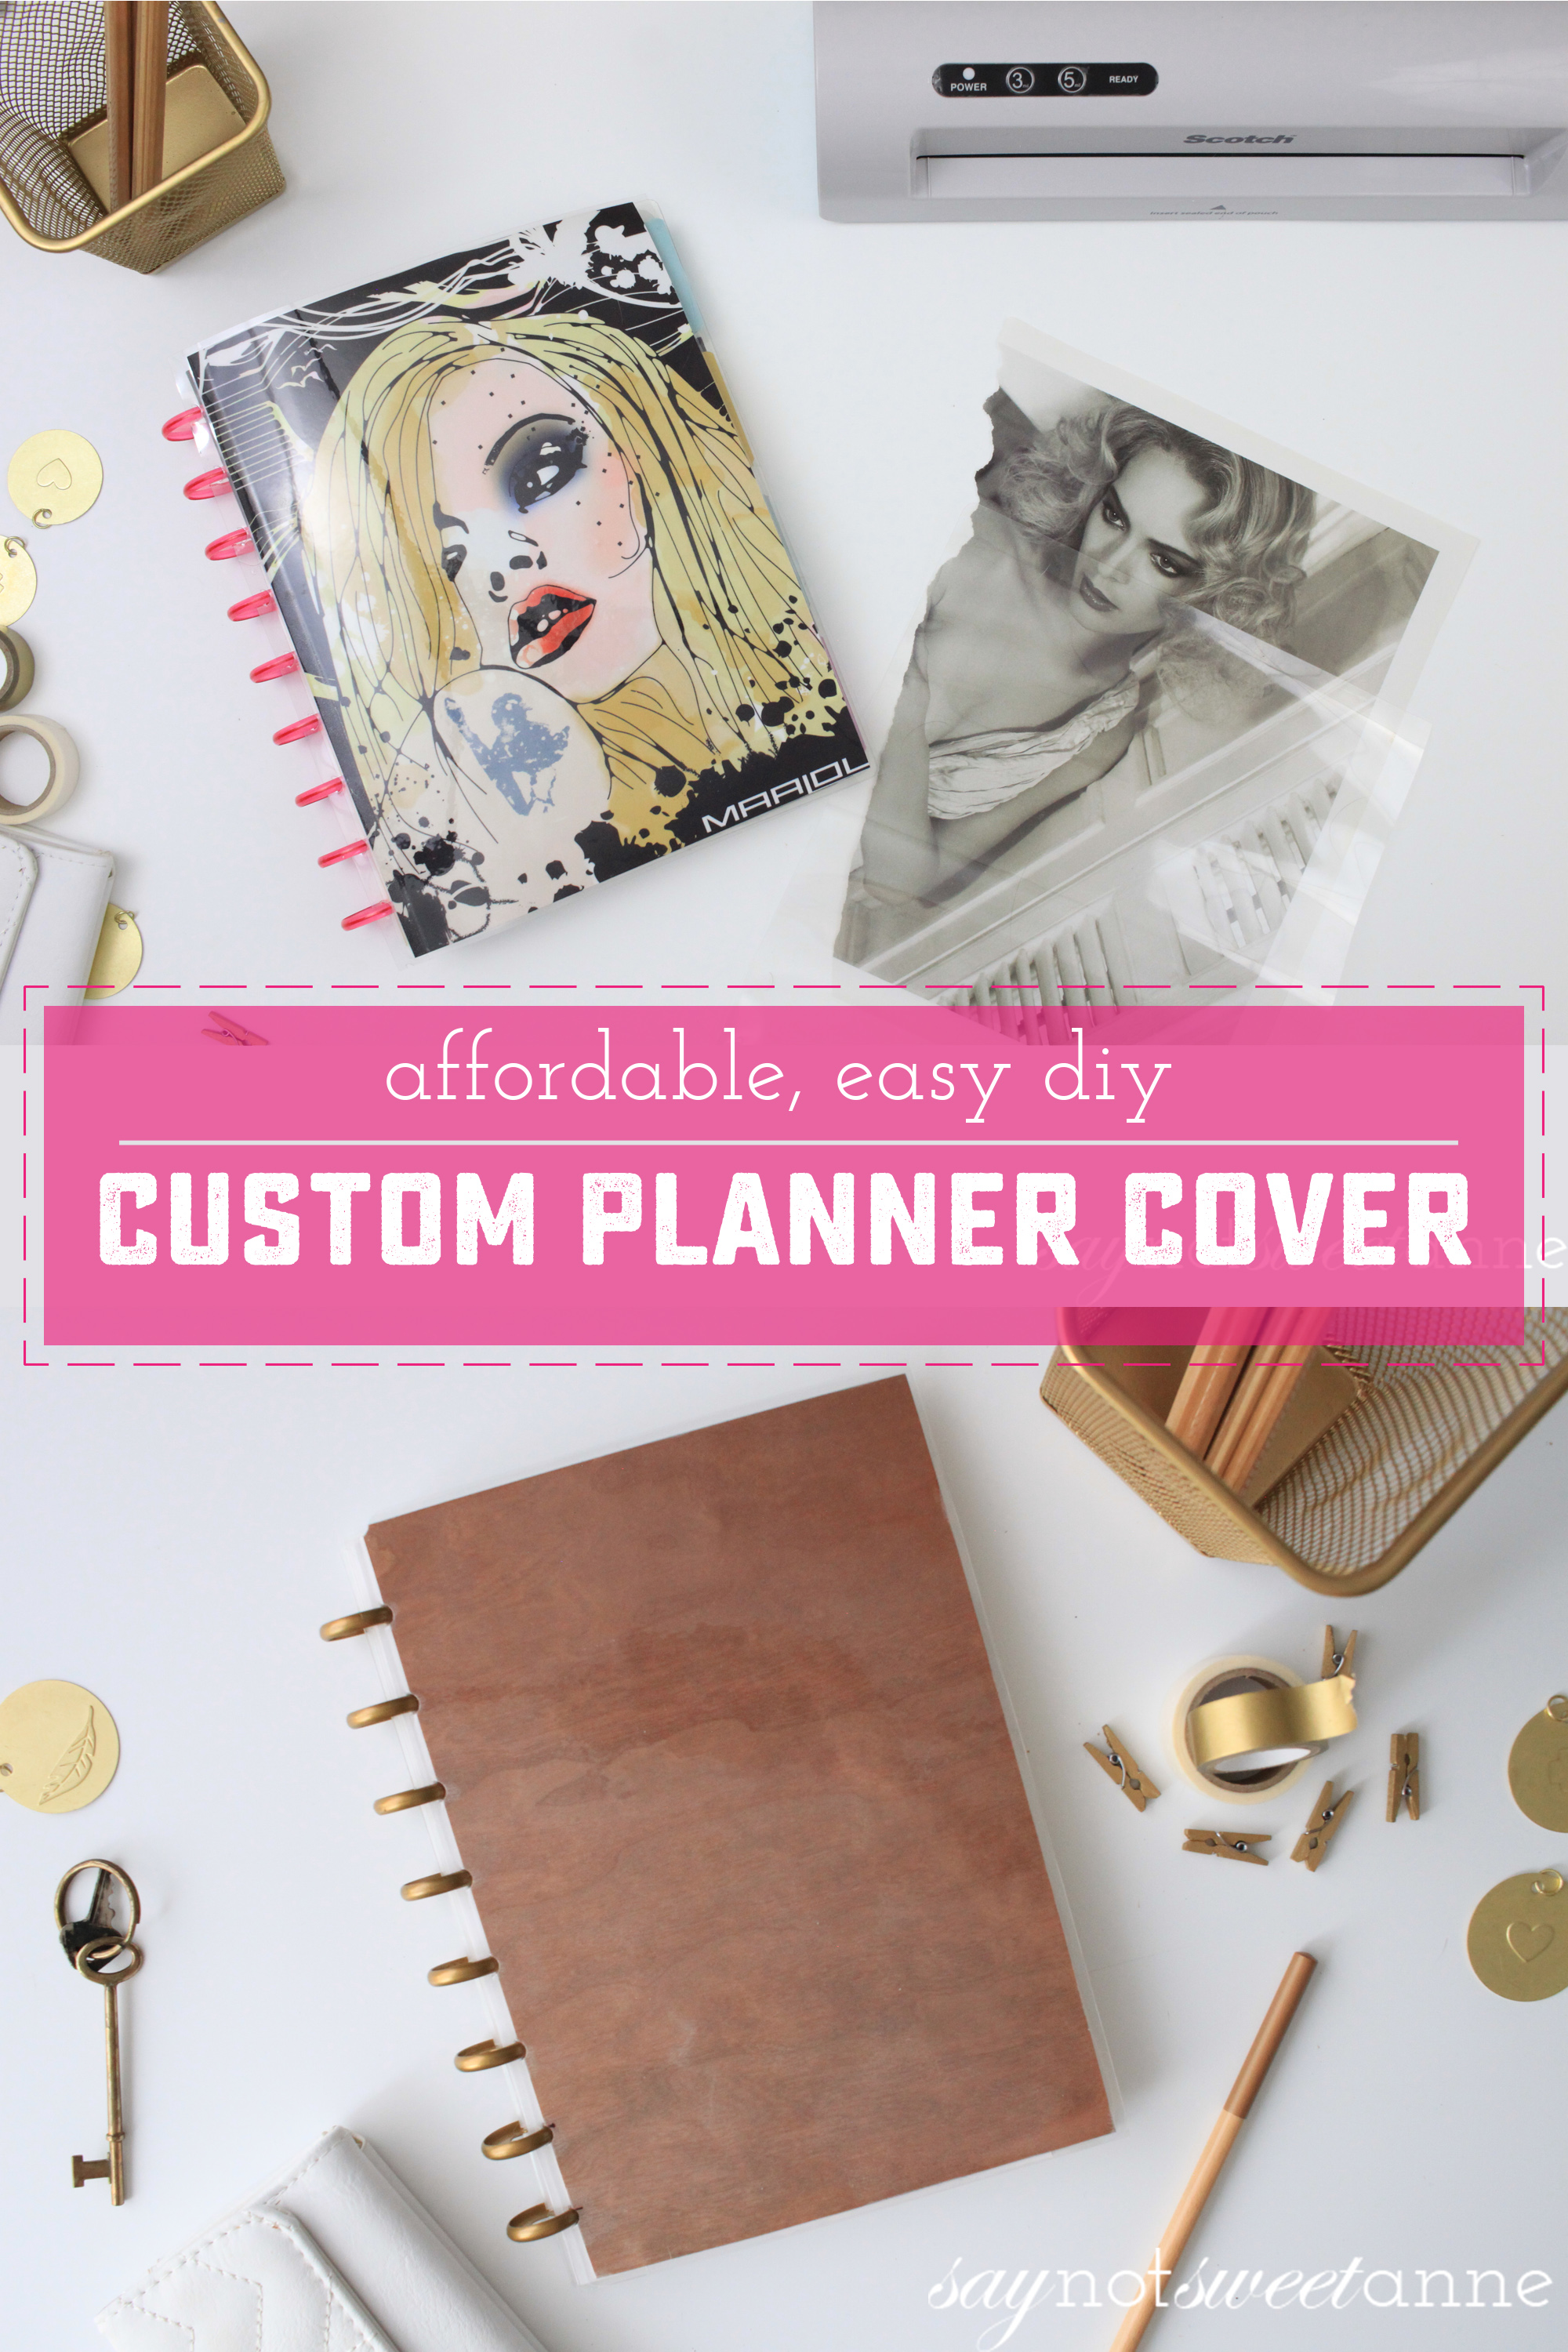
But what if you don’t like the look of it? How can you make custom Happy Planner and other discbound covers? Most of the commercial planners and notebooks have very bold covers, and a lot of them are just not my style. More than that though, I make a LOT of these notebooks from scratch. It is easy! I grab a set of discs from the store on online, I punch a bunch of my favorite premium paper, and voila! Or well, what would be voila if I only had a pretty cover.
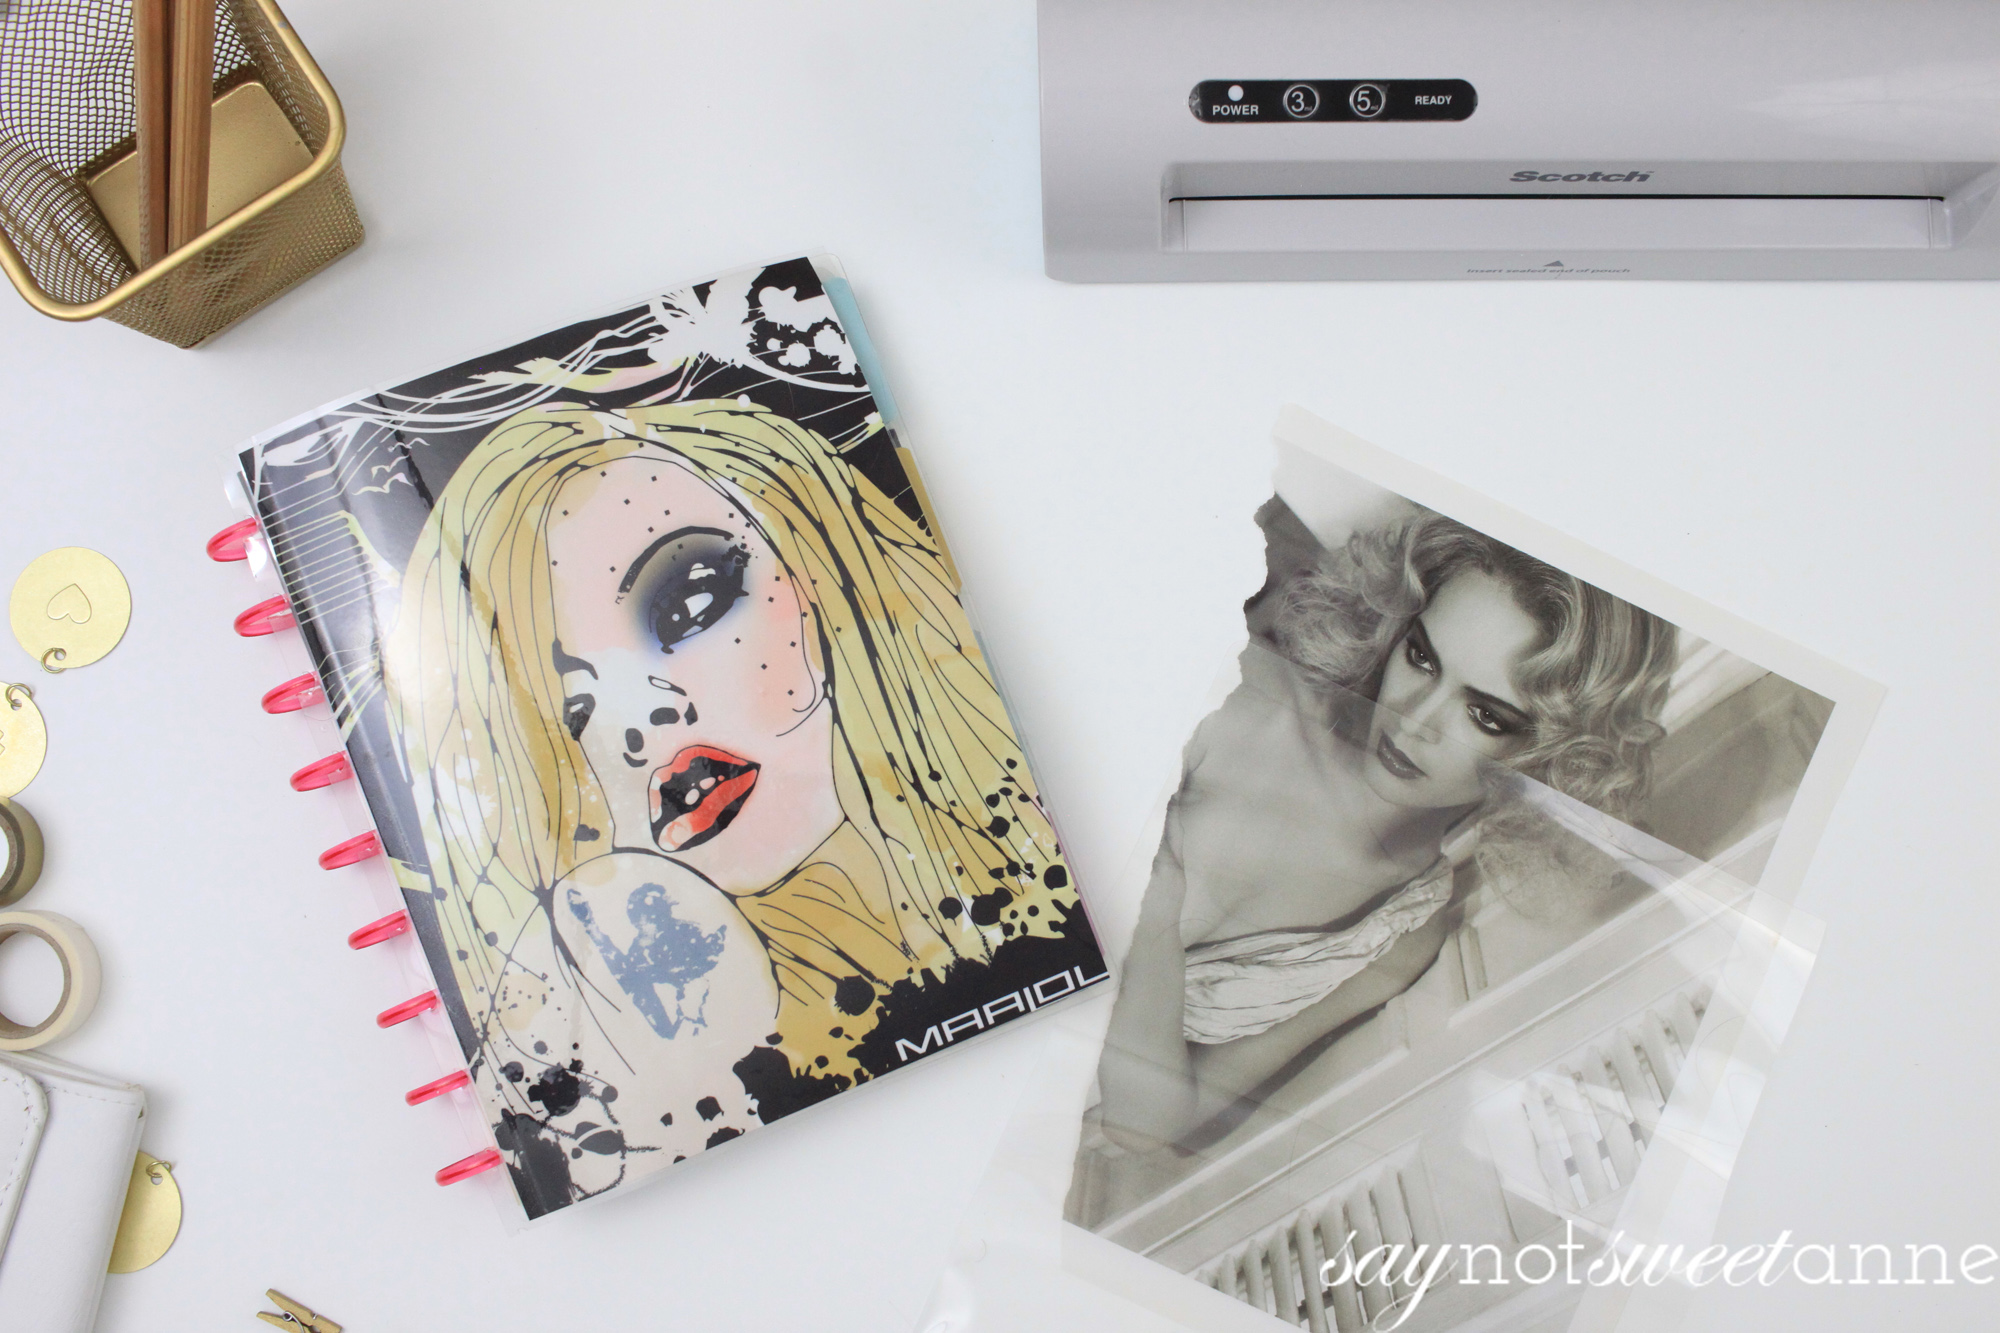
Most recently, this exact issue came to a head with my bullet journal. I wanted a small size like a journal usually is, but I needed watercolor paper and a lovely cover. I set to work in experimenting and I found a beautiful process for creating my very own discbound covers. These will fit Create 365 MAMBI Happy Planners, ARC notebooks and planners, Revolution, Discagenda, Levenger Circa, TUL, Martha Stewart, IQ 360, all of them! The very best part about this DIY Discbound cover they are so inexpensive and easy, that I can change covers for things whenever it suits me!
What You Need:
- 5 mil laminating pouches (I use the Scotch ones from Amazon)
- a laminator that will work with 5 mil pouches (This is the one I have)
- Paper for the cover
- A discbound punch (I’ve had this one for years!)
How To Make It:
- It might sound strange, but start by laminating an empty laminating pouch. Just run it through your machine as normal.
- Once your sheet has cooled, cut about a 3/4inch strip from it. This will be used to reinforce the punched area of your cover.
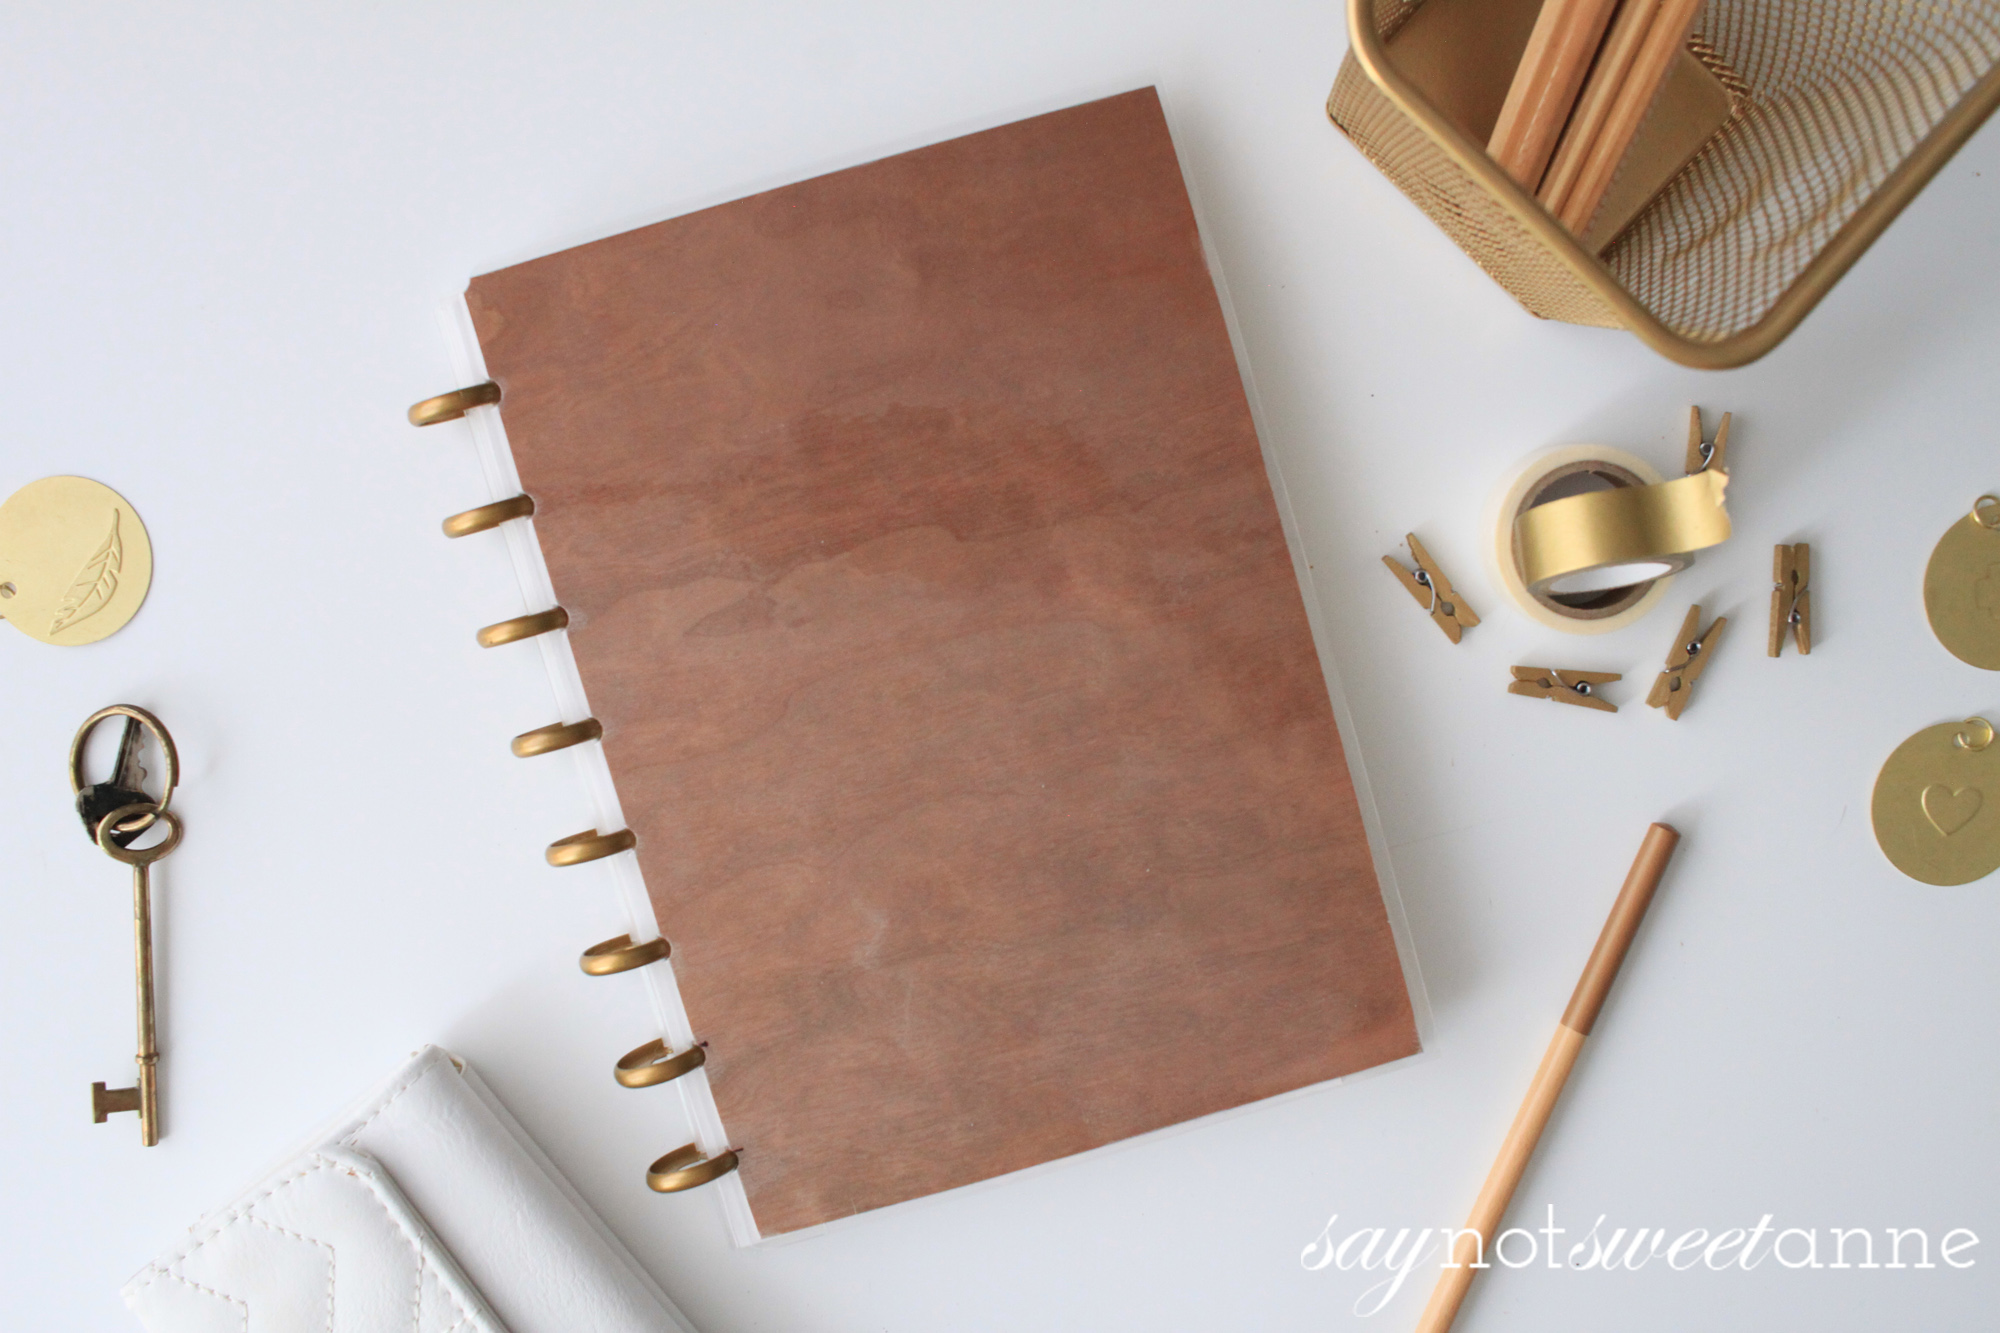
- Next, select your cover image and place it inside another laminating pouch. I went crazy using pages from old art magazines, some of my own watercolors and even a thin sheet of wood veneer!
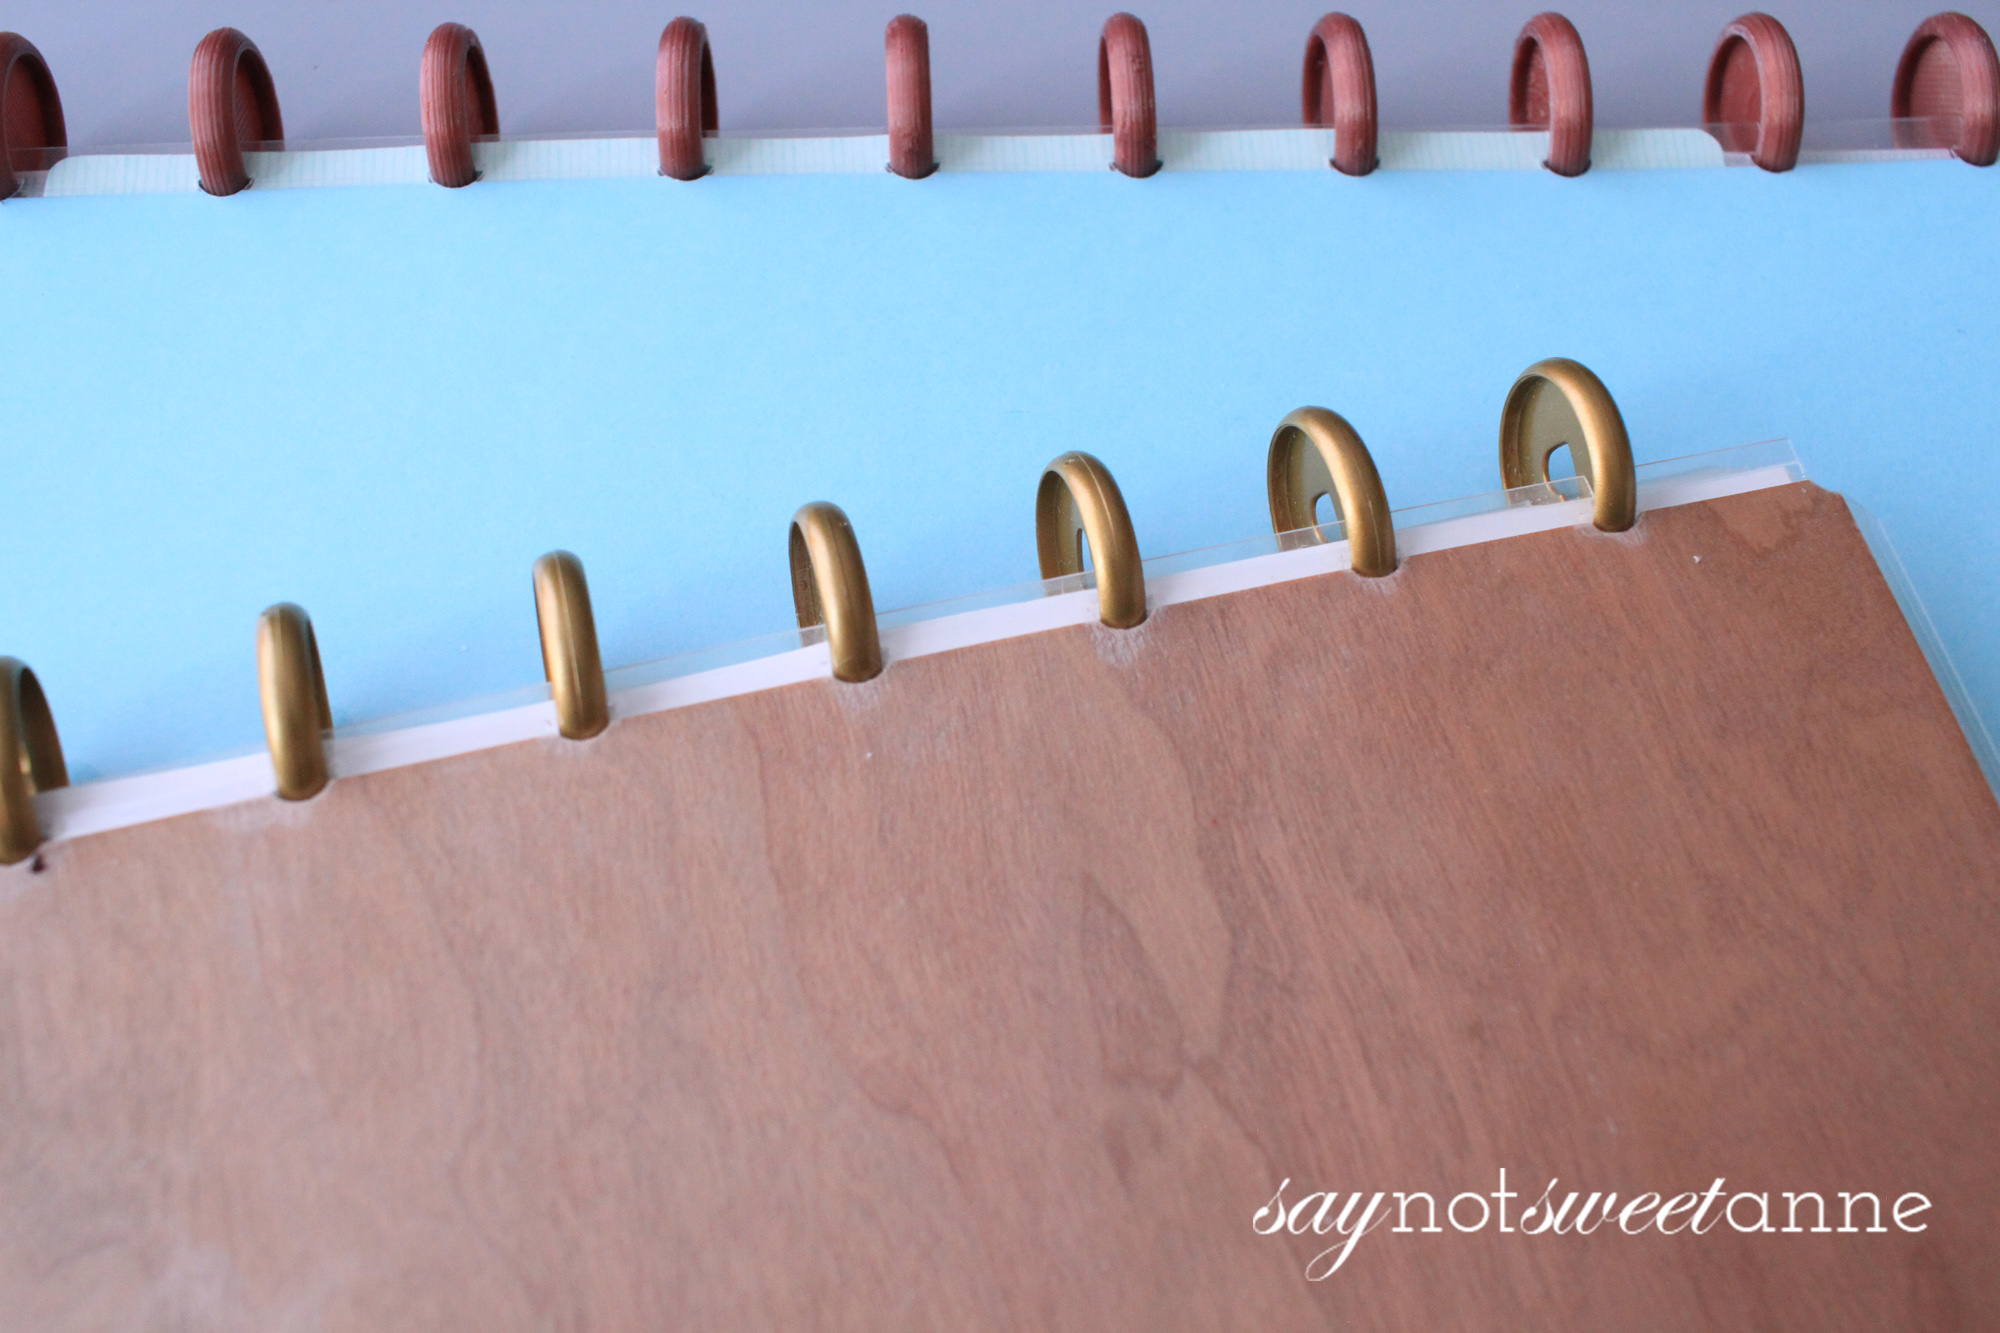
- Lay your 3/4inch sheet of laminated material inside the pouch, lined up with the left edge of the pouch. Essentially you’re making the finished lamination 10 mil thick in this area.
- Carefully feed the whole thing through your laminator. Be careful that the pre-laminated strip doesn’t move as you feed it in.
- What you get out should be a lovely laminated paper with double thickness on the left side. Take that to your disc punch. Using an old cover as a guide, line up your cover with the punches. It is important to note that you won’t punch this in the same place you punch the inside pages of your notebook. The cover needs to be offset by about 1/4 inch. When in doubt, copy an existing cover. When you’ve triple checked your line up – punch it!
- That’s it! The reinforced edge has worked extremely well for me. And I’m not particularly easy on notebooks. The 5mil thickness is just heavy enough for my tastes in a notebook cover and I absolutely love being able to make a new discbound or Happy planner cover whenever I want!
Kayla Domeyer
Latest posts by Kayla Domeyer (see all)
- Miniature Bohemian Style 1:12 Dollhouse Rattan Shelf - August 24, 2023
- How I made a DIY Prop Dragon Book (Twice!) - March 20, 2023
- How to Solve Stress with Princess Bathtub Melts - June 2, 2020
I just tried this out on some scrap paper and odds and ends I had laying around,I only had Fellows 3mil pouches,so I doubled it at the top and did it that way,it’s a little wonky,but like I said,I was just doing a rough draft so to speak to get the process down,it turned out pretty good,this has to be one of the most detailed and easy ones I’ve seen,I actually found my Arc punch brand new and a Arc leather letter size cover at Goodwill for $10 for both,huge score,but the cover is a interesting brown that I’m not fond of,have you tried making a top bound?
Dixie I’ve done tons of kinds of books now! This is still my favorite method and recently I’m experimenting with lasercut wood covers for my pretty books. 🙂
I don’t know that a top-bound would be any different from a regular book so I’d say give it a try!
Also – for your thrifted ARC leather cover – look into leather dye. You’ll never get rid of the brown but if you cover it in a vibrant blue for example, you might land at a nice muted blue tone. Be sure to test on an inconspicuous spot first!
I broke my punch on the laminated page 🙁 not your fault of course lol
Gigi I’m so sorry that happened to you!! Which punch do you have, and how did it break!? I have the large black ARC brand punch that can punch up to 40 pages at a time. It had no trouble.
Thank you SO much for the idea of reinforcing the punched edge with another piece of laminate! I tried 10 mil, and for some reason it just kept turning out somewhat limp, bendable, not good at all- tried 5 mil Scotch and it was amazing, but the punched edge just didn’t have the strength it really needed to hold up. Your idea was amazing, and I can’t wait to try it!
Aww, you are so welcome Mary!
What is the name of the laminator that you use? The link you provided goes to a 404 page on the Amazon website 🙁
Mine is from Scotch brand AShley – hope that helps!
Kayla,
Do you ever have a problem with ink running on paper that is design heavy? Will a hot laminator work for images I print myself, say on cardstock or something?
HI Katie!
No, I’ve never had a problem with the laminator on heavily printed items. I would think if you print inkjet that shouldn’t ever be a problem. Laser ink is affixed to the paper with heat, so ~maybe~ that might have a problem in certain circumstances? If you’re worried, you can always coat your cover with a light coat of clear sealer before laminating.
What are the exact measurements of the paper that you use?
What are the exact measurements of the paper that you cut down!
Hi Cee! I made several covers for this post, and I copied the size of the existing covers for each. Start with the book you want to make a cover for, and measure the interior pages. Add 1/4 inch to the length and width. That will be your cover size. Note that the laminating pouch will add another 1/8in or so.