
Well, we’re coming up on the busiest season home making has to offer. Between the baking, the decorating, gift wrapping, costume making and entertaining- the next three months are going to be hard on moms everywhere.
I for one find that there are a few little rituals I engage in during the busy times, that give me a little oasis of calm in the storm. Sometimes it’s indulging in some Cheese Cake Ice cream, sometimes its watching a little TV on the laptop while in bed. Most times, however, its a little self-manicure.
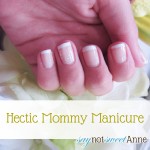
I love to do my nails. Its something that makes me feel well put together and presentable. This how-to will show you how you can get your salon quality mani in 20 minutes or less!
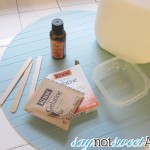
What You Need:
- Neutral nail polish color of your choice.
- Pleasant, moisturizing hand lotion, cuticle oil or -in a pinch- olive oil.
- White nail polish color of your choice.
- Paint brush (if using the technique from the video below.)
- Nail polish remover
- Q-tips
- Seche Vite <—-THIS IS IMPORTANT. It dries super fast, ultra shiney and self-leveling. I swear by this stuff. Its amazing.
How To Do It:
- Soak you hands in warm water with a couple drops of skin softening hand soap. It’ll only take 2-3 minutes, but try and relax while doing it. =D (You may also just start after a shower or bath.)
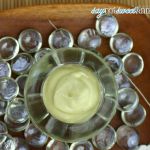
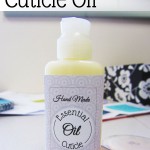
- Using your cuticle oil (I’ve got a super easy home-made recipe here) massage each cuticle for 20-30 seconds. I take this time to massage my hands in general, I find this part of the process is one of the most relaxing. Sometimes, if I pout enough- hubby will even do this part for me! ♥ The cuticle is the best place to deposit moisture for healthy nails. While the nail bed might absorb a little, the cuticle does most of the work.

- If you so choose, you can push back your cuticle GENTLY at this juncture. I don’t recommend cutting them, as that opens a door for infection. I actually don’t push them back either, as the “growing out” look doesn’t bother me.
- Dip the q tip in remover, and go over just the nail bed. The oil from the lotion can hinder the adhesion of your polish. This will help remove that oil. Be careful not to get it all over the skin, or you might dry out what you just moisturized.

- Apply a clear base coat. I use one for strength. You might skip this if you like.

- Apply your base neutral color. I’m sure you’re all familiar with how to apply nail polish- so I won’t go into detail. If you want to show you bare nail beds, skip this step. (Tip- if using the french tip method from the video below, do not apply a neutral color coat.)

- Using the method of your choice, apply a french tip. I used a Konad nail stamp for the tip and the flowers in these pictures- but I’ve since learned a WAY EASIER method. It is detailed in the video below. Basically you put the white on as messy as you want and then clean it up- instead of trying to apply it in a perfect thin half moon. In my opinion, this is the way to go. Let the white dry.

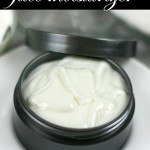
- Finally, the Seche Vite. This stuff is a quick dying very clear laquer. I apply it liberally, and then lay my hands on a level surface for the ~5 minutes it takes to dry. This stop coat adds serious dimension and shine, while hiding any imperfections AND drying your mani in record time. I love, LOVE LOVE this stuff.


- That’s it! Start to finish this will probably take you 20 minutes tops. And the Seche Vite will allow you to carry on with all but the most brutal tasks immediately. So, even in this sure-to-be hectic holiday season- take 20 minutes for Mommy. ♥


Check out my other Beauty Related posts!

The following two tabs change content below.

Kayla Domeyer
My name is Kayla and I am a Graphic Designer. That means that I love pretty things, and also that I like to make free printables! I'm so happy that you've stopped by to visit my blog, and I hope you will follow me on Facebook, Twitter, Google +, Pinterest or Instagram!! (Yeah, and I'm totally addicted to the internet).
Latest posts by Kayla Domeyer (see all)
- Miniature Bohemian Style 1:12 Dollhouse Rattan Shelf - August 24, 2023
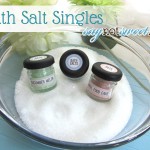
- How to Solve Stress with Princess Bathtub Melts - June 2, 2020
- 25 Valentines Even a Toddler Can Make - February 11, 2020
I can’t seem to find the video on the easy way to add the white tips. I’m kinda a klutz at that part . Need all the help I can get!
It seems they’ve taken the video down! Essentially, you purchase a fan brush (paintbrush), and then slather your tips with white. Then dip the brush in remover and use the fan shape to gently remove the extra while getting a nice half moon!
Great information — I am trying this tomorrow! Pinned. Thanks for linking on Busy Monday!
Charlene@APinchofJoy recently posted..Halloween Party for Preschoolers: Snacks and games
This is a fantastic French manicure for a whole lot less!
Libby recently posted..C25K – Week 8, Day 1